
How to Make a Halloween Mask: Craft 7 Unique, Spooky Designs
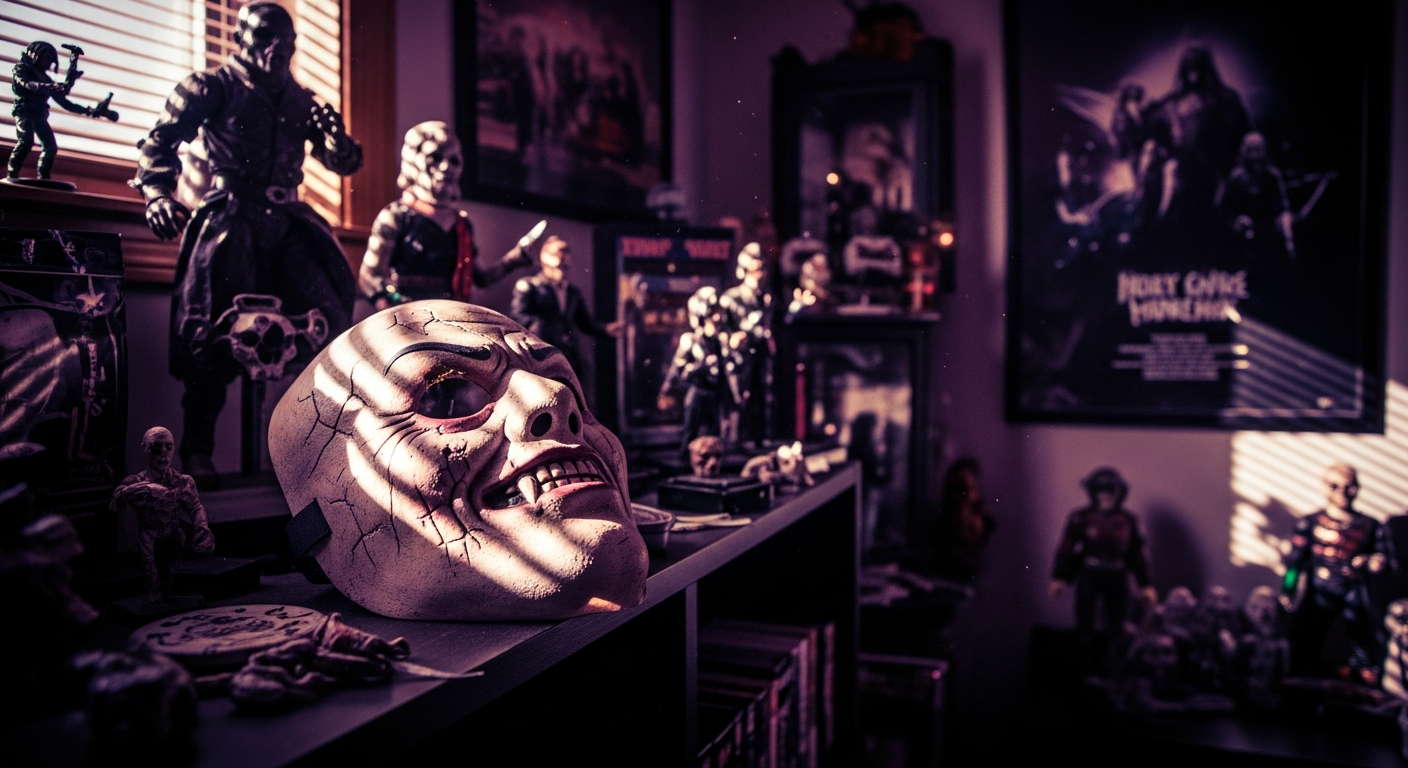
Halloween isn’t just a holiday; it’s an opportunity to embrace your darkest imagination and truly transform. Forget mass-produced masks that lack the soul and unique twist to make a costume unforgettable. What if you could conjure a creature from your own nightmares, a bespoke monstrosity that genuinely sets you apart? Here at Devil’s Dreamworld, we’ve found the biggest misconception about mask-making is its perceived difficulty. From our years in our workshop, meticulously crafting grotesque details, we know that anyone can learn and master this rewarding craft. While perfecting the art takes dedication, the community offers abundant tools and guidance, empowering all to experiment and bring their frightful visions to life. This guide shows you how to make a Halloween mask that embodies your unique spooky signature, turning heads and chilling spines.
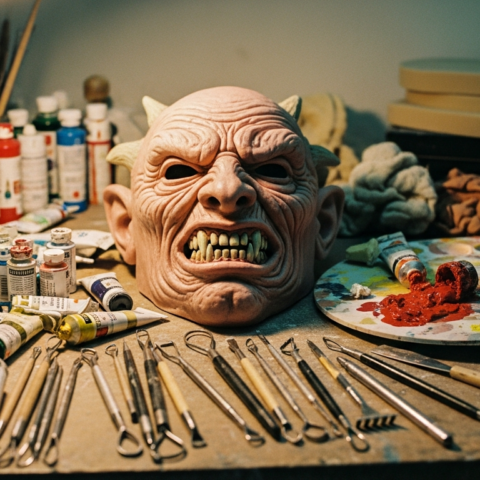
The satisfaction of seeing clay evolve into a horrifying visage, perfectly tailored to your macabre concept, is unparalleled. We’ve learned the simplest, most satisfying, start to your journey is to get some clay, choose compelling reference images, and begin sculpting something simple. For a durable, flexible mask, we then cast a one-part (or half mask) mold in gypsum plaster, ideal for a latex mask. We’ve refined our techniques, but fundamentals like proper preparation and the right tools make a true difference. In our experience, an organized workspace stocked with plenty of mixing cups, mixing sticks, and cloths for mould making is essential; scrambling for a crucial rag during curing is a nightmare! For sculpting, we swear by Chavant clay, paired with a heat gun for malleability and simple, sturdy tools, some even custom-made in our studio. These foundations are crucial for an exceptional DIY Halloween mask.
This comprehensive guide will equip you with the knowledge and hands-on techniques to craft your own terrifying masterpiece, from initial concept to intricate finishes. You’ll learn to brainstorm mask ideas, assemble your toolkit, and follow step-by-step instructions for everything from sculpting to detailed painting. We’ll explore methods for various horror styles, ensuring your handmade horror mask can be a grotesque monster or a classic villain. We’ll even share smart strategies for creating elaborate, custom Halloween masks on any budget. Ready to unleash your personal spooky signature and transform frightful fantasies into tangible terror? Let’s dive into how to make a Halloween mask that truly sets you apart this season.
Transform into your scariest self this Halloween by crafting a custom mask that truly stands out. Our comprehensive guide will walk you through everything from concept to creation, ensuring your homemade masterpiece is the talk of the night. Here’s a sneak peek at the essential insights you’ll gain:
- Ignite Your Creative Horror Concept: Learn to brainstorm and design compelling mask ideas, setting the foundation for a truly unique spooky creation that reflects your personal style.
- Assemble Your Mask Maker’s Toolkit: Discover the essential materials and tools needed for durable, detailed, and comfortable DIY Halloween masks, ensuring you have everything before you begin.
- Sculpt Your Vision Step-by-Step: Follow clear, actionable instructions for the entire mask-making process, from initial sculpting and molding to intricate painting techniques.
- Master Diverse Scare Techniques: Explore methods for crafting various horror styles, from grotesque monsters to classic villains, adapting to your desired terror level and character.
- Elevate with Haunting Details: Get expert tips on adding textures, effects, and finishes that transform a basic mask into a truly professional-looking, terrifying prop.
- Craft Creativity Without Breaking the Bank: Uncover smart strategies and material alternatives to create elaborate, custom masks on any budget, proving high quality doesn’t require high cost.
- Unleash Your Personal Spooky Signature: Embrace the freedom to personalize every element of your mask, making it a unique reflection of your creative vision and ensuring an unforgettable Halloween.
Ready to bring your frightful fantasies to life? Let’s dive into the step-by-step process of crafting seven unique and spooky Halloween masks that will truly set you apart.
Ignite Your Creative Horror Concept: Designing a Unique Halloween Mask
Embarking on the journey of how to make a Halloween mask is an exhilarating dive into personal creativity. Here at Devil’s Dreamworld, we understand the desire to craft something truly unique, something that goes far beyond generic store-bought designs.
Our goal is to empower you to create high-quality, distinctive handmade horror masks that embody your specific artistic vision. Let’s begin by sparking those terrifying ideas and laying the groundwork for your masterpiece.
Brainstorming Your Mask Identity: Craft Unique Halloween Mask Ideas
The first step in crafting a truly memorable mask is defining its identity. Think beyond simple costumes and delve into the backstory of your creature, whether it’s a classic monster reimagined or an original nightmarish entity.
We always recommend starting with strong reference images, allowing your imagination to draw from diverse sources like pop culture, ancient folklore, personal nightmares, or conceptual art. These inspirations are crucial for developing compelling DIY Halloween mask ideas.
When you learn how to make a Halloween mask, sketching is a vital part of the process for refining your vision. Don’t be afraid to experiment with different concepts and details on paper before committing to clay.
Remember to consider wearability and comfort from the outset; a stunning mask is only effective if it can be worn for extended periods. This practical aspect is often overlooked but crucial for a successful Halloween mask design.
From Concept to Blueprint: Developing Your Mask’s Design
Once you have a general idea, it’s time to translate it into a detailed blueprint. Creating comprehensive reference images and sketches from multiple angles will guide your sculpting process.
Understanding basic facial anatomy and proportions is key to achieving a custom fit that looks natural and intimidating. Even for monstrous designs, grounding them in realistic proportions can enhance their horror.
As you plan your handmade horror mask, meticulously mark where eyeholes, mouth openings, and attachment points will be. These details ensure your mask functions as intended and is comfortable to wear, moving you closer to perfecting how to make a Halloween mask.
Assemble Your Mask Maker’s Toolkit: Essential Materials and Tools for DIY Halloween Mask
Preparing your workspace and gathering the right supplies is paramount when learning how to make a Halloween mask. Our experience has taught us that an organized approach saves immense frustration and ensures better results.
Having a clear workspace and being organized is incredibly important; the last thing you want is to be hunting for a crucial tool during a critical curing period. This preparation is essential for every stage of making a unique Halloween mask.
Gathering Your Essential Mask Making Materials
The choice of materials is fundamental to the aesthetic and durability of your mask. When it comes to sculpting, we rely on specific mediums to achieve our desired detail and form.
In the sculpting process, we use Chavant clay, which is an oil-based plasteline known for its smooth texture and ability to hold fine detail without drying out. This choice significantly impacts the quality of your initial handmade horror mask sculpture.
When considering mould making, popular choices include gypsum plaster, silicone, or even fiberglass. Each has its advantages for capturing intricate details and creating a durable mould for repeated use, as you can learn more about in our mould making guide.
For casting materials, latex is excellent for flexible and wearable masks, while resin is perfect for rigid designs like a skull Halloween mask. You can explore more about mask making materials on our site, which helps you decide how to make a Halloween mask with specific textures.
Finishing supplies such as acrylic paints, sealants, glues, and various embellishments will bring your mask to life. These elements add the crucial details that elevate a simple mask into a truly terrifying custom Halloween mask.
For those exploring how to make a Halloween mask on a budget, consider repurposing household items or exploring discounted art supplies. You might be surprised at the elaborate DIY Halloween masks you can create with inventive, cost-effective materials.
Your Essential Mask Making Tools
Having the right tools is just as important as selecting the right materials for your homemade Halloween mask. For sculpting, simple loops, rakes, spatulas, and custom tools are invaluable.
We’ve found a heat gun to be incredibly useful when working with Chavant clay, as it helps to soften the material for easier manipulation and blending. These simple tools, alongside our own custom-made ones, are key to achieving precise details in our sculptures.
During the mould making phase, ensure you have plenty of mixing cups, mixing sticks, and rags or cloths on hand. Having a stocked-up supply is essential to prevent frantic searches during time-sensitive processes, ensuring a smooth flow when creating your unique Halloween mask.
Safety equipment, including gloves, masks, and proper ventilation, is crucial when working with various chemicals and dusts. Always prioritize your health and well-being during the mask making process. You can find general safety guidelines from reputable sources like the HSE for handling materials safely.
Specialized tools like airbrushes can elevate your painting, allowing for smooth gradients and fine details on your custom Halloween mask. These tools contribute significantly to the professional finish of a handmade horror mask.
Sculpt Your Vision Step-by-Step: From Concept to Clay
Sculpting is where your Halloween mask truly begins to take form. This phase requires patience and attention to detail, transforming your initial ideas into a tangible base.
As we often advise, get some clay and start sculpting, using your reference images to guide you. This hands-on approach is the most satisfying start to how to make a Halloween mask.
Preparing Your Armature for Sculpting Masks
An armature provides the necessary support for your clay sculpture, preventing it from collapsing under its own weight. This foundation is crucial for maintaining the integrity of your design throughout the sculpting process.
You can use a simple head form or a custom support structure, ensuring it’s robust enough for stability. A secure armature allows you to work confidently, focusing on the intricate details of your handmade horror mask.
Securing your armature firmly to a sturdy base prevents unwanted movement, especially as you build up heavier layers of clay. This preparation is a small but vital step in learning how to make a Halloween mask effectively.
The Art of Clay: Sculpting Your Initial Mask Form
Start by building up the basic shape and proportions of your mask, focusing on the overall silhouette before delving into fine details. This foundational layer sets the tone for your scary Halloween mask.
Next, refine the facial features and anatomical details, constantly referring to your sketches and reference images. This iterative process helps ensure accuracy and brings your vision to life.
Adding texture and surface detail, from smooth skin to grotesque wrinkles and scars, gives your custom Halloween mask its unique character. These textures are what differentiate a generic design from a truly memorable handmade horror mask.
Techniques for ensuring symmetry and balance are essential, even for asymmetrical designs, to maintain a cohesive and professional look. Regularly step back and view your sculpture from different angles to spot any imbalances, perfecting how to make a Halloween mask that stands out.
Finalizing Your Sculpture for Moulding
Before moving to moulding, take time to smooth and perfect the surface of your sculpture. Any imperfection on the clay will be replicated in the mould and, subsequently, on your final Halloween mask.
Carefully address any undercuts – areas where the clay protrudes in a way that would make demoulding difficult or impossible. These often require creative solutions or design adjustments.
Preparing the sculpture meticulously for the next crucial step of mould making ensures a successful transfer of your design. This attention to detail is critical when you want to create a unique Halloween mask with intricate features.
Bringing Your Monster to Life: Moulding and Casting Your Mask
Moulding and casting are the transformative steps where your clay sculpture becomes a durable, wearable object. This process, central to how to make a Halloween mask, requires precision and careful execution.
Our experience shows that choosing the right mould material is vital for capturing every intricate detail of your design. This stage is where your scary Halloween mask truly takes shape from its initial sculpted form.
Crafting the Perfect Mould: Capturing Every Detail
Choosing your mould material depends on the complexity of your sculpture and the casting material you plan to use. Gypsum plaster is a common choice for its affordability and ability to capture detail, especially for a latex mask.
For beginners, we recommend casting a one-part (half mask) in gypsum plaster for a latex mask, as it’s the simplest yet most satisfying start to mask making. This approach minimizes complexity while still yielding impressive results.
For more complex designs, a multi-part mould might be necessary, ensuring every nuance of your handmade horror mask is perfectly replicated. Silicone is excellent for highly detailed and flexible moulds, while fiberglass offers rigid durability.
Proper mixing and application techniques for your chosen mould material are critical to avoid air bubbles and ensure a complete, accurate impression. Refer to our mould making guide for detailed instructions and best practices.
When demoulding your sculpture, extreme care is needed to preserve all the delicate details. Rushing this step can damage both your sculpture and your newly created mould, hindering your goal to make a Halloween mask perfectly.
Casting Your Mask: From Mould to Masterpiece
Before casting, prepare your mould by thoroughly cleaning it and applying appropriate release agents. This crucial step prevents your casting material from sticking and ensures an easy demoulding process.
Working with casting materials like latex, resin, or foam latex requires understanding their specific properties and curing times. Each material offers different levels of flexibility, detail, and durability for your custom Halloween mask.
Techniques vary: you might pour resin for solid parts, slush cast latex by rotating the mould, or brush layers of foam latex for a lightweight mask. Each method is designed to create a unique Halloween mask with specific characteristics.
Adhering to the specified curing times is essential for the material to fully set and achieve its intended properties. Patience during this stage will result in a stronger, more durable homemade Halloween mask.
Trimming and Preparing Your Raw Mask
Once cured, carefully remove your raw mask from the mould. This is often the first moment you truly see your creation come to life, embodying your vision of how to make a Halloween mask.
Trim away any excess material, often called flashing, using sharp scissors or a craft knife. Smoothing the edges ensures a clean, professional finish and prevents discomfort for the wearer.
Finally, prepare the surface for painting by cleaning it thoroughly and adding any necessary ventilation holes or attachment points for straps. These steps are vital for both the aesthetic and functionality of your Halloween mask.
The Art of Terror: Painting and Finishing Your Custom Halloween Mask
Painting is where your handmade horror mask truly gains its terrifying personality and depth. This stage transforms the raw cast into a finished masterpiece, defining its character and scariness.
The choices you make with colors and techniques will dictate the overall mood and impact of your custom Halloween mask, making this a pivotal step in how to make a Halloween mask.
The Painter’s Palette: Choosing Your Colors and Techniques
Selecting appropriate paints is crucial; latex masks require flexible paints like liquid latex or specialized acrylics, while resin masks can handle most acrylic or oil-based paints. Matching the paint to the material ensures durability and a professional finish.
Color theory plays a significant role in horror. Using unsettling hues, contrasting tones, and subtle shifts in color can evoke fear and unease, enhancing the terror of your scary Halloween mask.
Mastering basic painting techniques such as base coats, washes for grime, dry brushing for texture, and layering for depth will dramatically improve your mask’s appearance. These techniques add realism and complexity to your design.
Bringing Out the Horrific Details with Paint
Add depth and dimension through careful shading and highlights, emphasizing contours and textures. This technique makes your mask’s features pop and appear more lifelike or grotesque.
Painting realistic eyes, teeth, and wounds requires a steady hand and attention to detail. These small elements are often the most impactful in conveying emotion and horror, vital for how to make a Halloween mask truly terrifying.
Special effects painting, like creating realistic blood, grime, decay, or aged textures, will elevate your custom Halloween mask to a professional level. Think about the story these details tell.
Utilizing an airbrush allows for smooth gradients, fine details, and consistent coats, which is particularly effective for large areas or subtle blending. It can give your homemade Halloween mask a refined, professional finish.
Sealing and Protecting Your Mask
Once your painting is complete, applying appropriate sealants or clear coats is essential for durability and to protect your artwork. This step preserves the vibrant colors and prevents chipping or wear.
Ensuring your paintwork is protected means your unique Halloween mask will endure through multiple Halloween events. A good sealant also provides a desired finish, whether matte, satin, or glossy.
Master Diverse Scare Techniques: Crafting 7 Unique DIY Halloween Mask Designs
Now that you understand the fundamental steps of how to make a Halloween mask, let’s explore some specific designs. These examples showcase how different techniques and artistic choices can create diverse levels of horror.
Each design here presents a unique challenge and opportunity for creative expression, moving you closer to crafting truly distinctive results that go beyond generic scary masks.
1. The Classic Undead Ghoul: Easy Handmade Horror Mask
Sculpting gaunt features, sunken cheeks, and exposed bone structures lays the foundation for an authentic undead ghoul. Think about the effects of decomposition and starvation.
Painting techniques for decaying flesh, greenish-grey tones, and deep, shadowed eye sockets are essential for this look. Use washes and dry brushing to simulate rot and grime. For a deeper dive, see our guide on how to make a realistic zombie mask.
Adding torn fabric scraps, matted hair, or even a few artificial maggots can enhance the realism of your zombie. These details make your handmade horror mask truly unsettling.
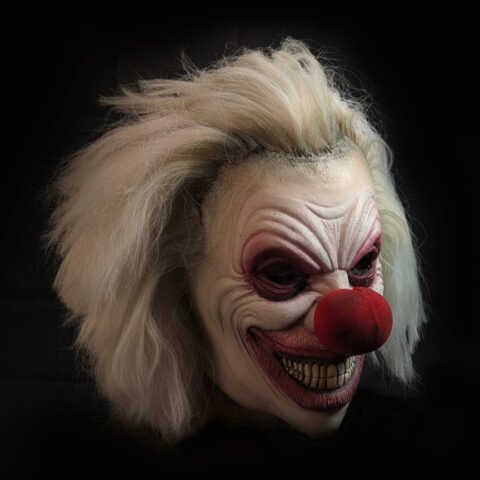
2. The Twisted Clown: A Grotesque Halloween Costume Craft
Exaggerated and distorted facial expressions, such as a perpetually wide, unsettling grin or narrowed, maniacal eyes, are key to a terrifying clown. Focus on unsettling proportions to create a custom Halloween mask.
Bold, contrasting colors like vibrant reds, harsh whites, and deep blacks with unsettling patterns will give your clown an insane aesthetic. Ditch the friendly polka dots for jagged stripes and smears.
Incorporating grotesque elements like sharp, jagged teeth, dripping “makeup” effects, or even stitched scars elevates the horror. This moves your DIY Halloween mask far beyond a comical appearance.
3. The Demonic Entity: Craft Unique Halloween Mask with Horns
Sculpting menacing horns of varying shapes and sizes, sharp features, and deep, shadowed brows creates an immediate impression of malevolence. Consider bone structures that suggest an unnatural origin.
Painting with dark, fiery hues, deep reds, and subtle metallic accents will give your demonic mask an otherworldly glow. Think about how light would catch sharp edges and infernal depths.
Adding textured details like scales, cracked skin, or rough, volcanic surfaces enhances the ancient and powerful feel of your unique Halloween mask. These textures contribute greatly to its intimidating presence.
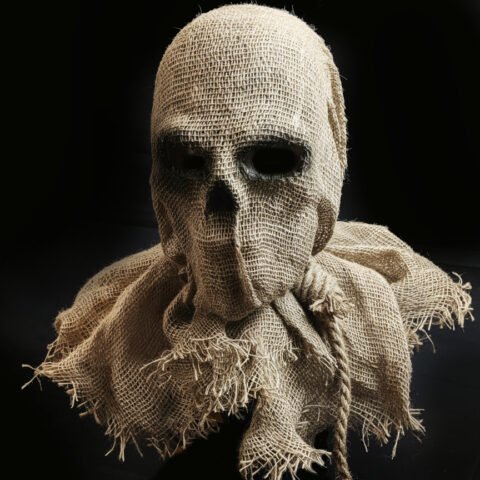
4. The Ancient Scarecrow: A Textured, Rustic Horror Mask
Emphasizing burlap textures and rough, weathered surfaces through sculpting and painting techniques is crucial for an ancient scarecrow. The material itself should tell a story of neglect and exposure.
Creating hollow, empty eye sockets and a stitched, grotesque mouth evokes a sense of soulless dread. These features hint at a once-human form now twisted and empty.
Distressing techniques for an aged and eerie appearance, such as cracks, fading, and dirt effects, are vital. This approach is reminiscent of our own scarecrow latex and burlap Halloween mask, which perfectly captures a rustic, unsettling vibe.
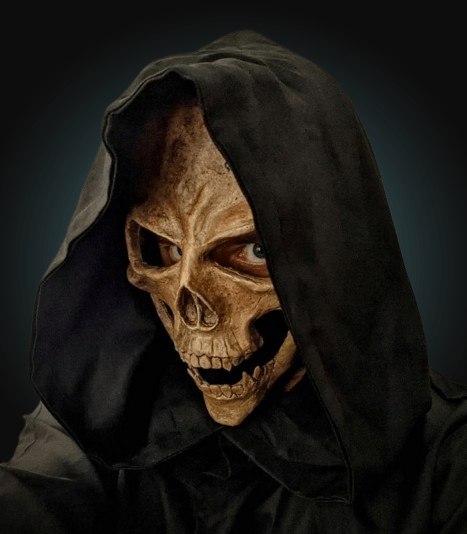
5. The Grinning Skull: A Realistic and Haunting Custom Halloween Mask
Detailed anatomical sculpting of the human skull, paying close attention to bone structure and dental details, creates a realistic and haunting effect. Accuracy is key to this custom Halloween mask.
Achieving realistic bone texture and subtle discoloration, like hints of age or earth, gives the skull an authentic and ancient feel. Avoid overly pristine whites for a more eerie presence.
Adding a menacing grin or even incorporating jaw articulation for movement can significantly enhance the mask’s impact. Explore our skull half mask projects for inspiration on making your own haunting skeletal visage.
6. The Forest Spirit: An Organic and Ethereal Spooky Design
Incorporating natural elements like bark, moss, roots, and twisted branches directly into your sculpture lends an organic, ancient feel. This mask should look like it grew from the earth itself.
Painting with earthy tones, deep greens, browns, and subtle iridescent accents will give the spirit an ethereal, mystical quality. Think about the interplay of light and shadow in a deep forest.
Creating an otherworldly, ancient creature vibe involves blending humanoid forms with natural textures, suggesting a being deeply connected to the wilderness. This custom Halloween mask evokes primal fears.
7. The Sci-Fi Xenomorph: A Futuristic Horror Mask Design
Sculpting sleek, biomechanical forms, elongated features, and a streamlined silhouette creates an unmistakably alien aesthetic. Think about smooth, yet menacing lines for your DIY Halloween mask.
Painting with dark, glossy finishes, deep charcoals, and metallic highlights enhances the futuristic and terrifying look. The surface should appear both organic and impossibly engineered.
Adding intricate tubing, exoskeletal details, or even internal glowing elements reinforces the alien nature. This design pushes the boundaries of how to make a Halloween mask into the realm of science fiction horror.
Elevate with Haunting Details: Transforming Basic Masks into Professional Props
Moving beyond the basic construction of how to make a Halloween mask involves adding those crucial details that elevate a simple prop into a truly professional piece. This is where your custom Halloween mask goes from good to exceptional.
Our experience has shown that these finishing touches are what make a handmade horror mask genuinely stand out, capturing attention and inspiring awe.
Adding Realism Through Texture and Material Integration
Using real hair, synthetic fur, or fabric scraps can significantly enhance the authenticity and texture of your mask. Strategic placement makes a huge difference to the realism of your scary Halloween mask.
Applying synthetic blood, slime, or ooze effects precisely where they make the most impact can create gruesome realism. These details tell a story of violence or decay, vital for a truly unique Halloween mask.
Incorporating small, tangible objects like artificial teeth, claws, or embedded metallic elements adds a tactile dimension to your mask. These physical details often achieve a level of realism paint alone cannot.
Advanced Effects and Functionality
Creating glowing eyes with small LED lights can give your mask an otherworldly or malevolent presence, especially in low light. This is an advanced step in how to make a Halloween mask truly terrifying.
Implementing moving jaws or other facial features through simple mechanisms can make your mask incredibly dynamic and lifelike. This level of functionality demands careful planning during the sculpting phase.
We’ve found that projects like the Krampus mask we made for a promotion for Phasmophobia truly pulled a lot of our skills into one project, adding electronics for the eyes, hair work, and intricate sculpting. This kind of integration demonstrates the potential for a truly unique Halloween mask.
Exploring practical effects like internal smoke or mist dispensers can add a dramatic, atmospheric impact to your mask. These elements are designed to shock and immerse viewers in your horrifying creation.
Comfort and Fit for Your Handmade Horror Mask
Adding internal padding and adjustable straps is essential for secure and comfortable wear, especially if your mask is worn for extended periods. A comfortable mask allows the wearer to fully inhabit the character.
Ensuring proper ventilation and clear visibility prevents discomfort and accidents. Strategically placed small holes or mesh can improve airflow without compromising the mask’s aesthetic, a crucial detail in how to make a Halloween mask functional.
Craft Creativity Without Breaking the Bank: Budget-Friendly Mask Making
You don’t need an unlimited budget to create an impressive Halloween mask. Resourcefulness and smart planning can lead to equally stunning results, proving that anyone can learn how to make a Halloween mask.
Our biggest takeaway is that anyone can learn and do this; while it takes skill to perfect, there are enough tools and helpful people in the community to experiment for themselves.
Smart Strategies for Sourcing Materials Affordably
Utilizing household items and recycled materials, such as cardboard, plastic bottles, or old textiles, can form the basis of fantastic masks. These materials can be surprisingly versatile for a unique Halloween mask.
Finding discounted or repurposed art supplies from thrift stores or clearance sections is a great way to save money. You never know what hidden gems you might discover for your next homemade Halloween mask project.
Learning to make your own substitutes for specialized materials, such as homemade paper maché clay or natural dyes, can significantly cut costs. This encourages innovation in how to make a Halloween mask.
Tips for Maximizing Your Budget
Focus on cost-effective sculpting and casting methods, like starting with a simple one-part plaster mould for a latex mask. These beginner-friendly techniques are often less expensive and very satisfying.
Prioritizing impact areas for intricate detailing allows you to save on less visible parts of the mask. Concentrate your efforts and budget on the features that will truly define your scary Halloween mask.
Learning from mask making tutorials and guides helps you avoid costly mistakes and material waste. Investing time in research before you buy materials can save you money in the long run on your DIY Halloween mask.
Unleash Your Personal Spooky Signature: Embracing Customization
The ultimate reward in learning how to make a Halloween mask is the ability to infuse it with your own personal spooky signature. This process allows for truly unique, high-quality handmade horror masks that resonate with your individual artistic vision.
We firmly believe that anyone can learn and do this, and the community offers immense support for those wanting to experiment and create their own distinctive results.
Making Your Mask Truly One-of-a-Kind
Reflecting your unique artistic style and horror sensibilities is what transforms a generic mask into a masterpiece. Let your personal nightmares and creative flair guide every decision.
Combining various techniques and inspirations, perhaps a touch of folklore with a dash of cyberpunk, allows you to create something novel and unforgettable. This fusion results in a truly one-of-a-kind Halloween mask.
The Rewards of a Personalized Halloween Mask
The satisfaction of crafting your own masterpiece, a truly personalized handmade horror mask, is immeasurable. There’s a profound sense of accomplishment in bringing your terrifying vision to life with your own hands.
Standing out from the crowd with an unforgettable, original costume is one of the biggest joys of custom mask making. Your unique Halloween mask will undoubtedly be a talking point.
Inspiring others with your creativity and dedication encourages a vibrant community of DIY enthusiasts. Your terrifying creations can motivate others to explore their own artistic potential in learning how to make a Halloween mask.
The Journey of Terror, Realized: Crafting Your Own Haunting Vision
Embarking on the journey of mask making, as we at Devil’s Dreamworld know firsthand, is a deeply rewarding dive into the heart of creativity. We’ve explored the intricate process of how to make a Halloween mask, from the initial spark of an idea to the chilling final brushstroke. What began as a conceptual seed, nurtured by diverse inspirations and thoughtful design, transforms into a tangible piece of wearable horror art. This entire process is far more than just assembly; it’s a testament to patience, skill, and the power of imagination. In this conclusion, we’ll distil the core insights from our shared journey, reinforcing why this craft is so compelling and inspiring you to unleash your own unique nightmare.
Foundational Elements: Vision to Form
From Concept to Clay
The foundation of any truly terrifying mask lies in its initial concept. We’ve emphasized the importance of defining your mask’s identity, drawing from a rich tapestry of pop culture, folklore, and even personal nightmares. Our experience has shown that starting with strong reference images and dedicating time to sketching different concepts on paper is paramount. This iterative design phase ensures that practical considerations like wearability and proper ventilation are integrated from the very beginning, setting the stage for a successful build. As we often advise in our workshop, for beginners, there’s no substitute for getting some clay in hand and starting simple, guided by your chosen reference images. This hands-on approach is the most satisfying entry point into the craft, allowing you to quickly move from abstract ideas to a physical form that can be refined over time.
The Maker’s Toolkit
A well-prepared workspace and the right selection of tools and materials are non-negotiable for a smooth mask-making process. We’ve learned through countless hours in the studio that an organized approach saves immeasurable frustration. As we’ve regrettably discovered ourselves, having a clear workspace and being organized is incredibly important; the last thing you want to be doing is hunting for a crucial cloth during a critical curing period when you’re mould making! For sculpting, we rely on Chavant clay for its smooth texture and detail retention, often using a heat gun to soften it for easier manipulation. Our go-to tools include simple loops, rakes, spatulas, and even some custom-made tools that we’ve developed along the way to achieve precise details. When moving onto mould making, we always ensure we have plenty of mixing cups, mixing sticks, and rags or cloths on hand. Having a stocked-up supply is essential to avoid frantic searches during time-sensitive processes, ensuring a seamless flow as you work to create your unique Halloween mask. Whether you’re opting for flexible latex or rigid resin, the quality of your materials directly impacts the final look and durability of your creation.
Bringing Monsters to Life: Moulding, Casting & Artistry
From Sculpture to Replica
The metamorphosis from a delicate clay sculpture to a robust, wearable mask is achieved through the precise stages of moulding and casting. We’ve explored how the choice of mould material, be it gypsum plaster, silicone, or fiberglass, is crucial for capturing every nuance of your design. For those just starting out, we consistently recommend casting a one-part (half mask) in gypsum plaster for a latex mask. It’s the simplest, yet most satisfying start to mask making, allowing you to master the fundamentals without excessive complexity. Mastering proper mixing, application, and careful demoulding techniques, which you can delve into further in our mould making guide, ensures a flawless transfer of your terrifying vision. Once the mould is ready, preparing it with release agents and understanding the unique properties and curing times of different casting materials are vital for producing a professional-grade raw mask, ready for its final artistic flourish.
The Palette of Fear
Painting is where your handmade horror mask truly gains its personality and depth. We’ve emphasized selecting appropriate paints for your material, be it flexible latex paints or versatile acrylics for resin. The strategic application of color theory, from unsettling hues to stark contrasts, dictates the emotional impact of your design. Techniques like base coats, washes for grime, dry brushing for texture, and layering for depth dramatically enhance realism and complexity. Adding intricate details like realistic eyes, decaying teeth, or gruesome wounds can transform a simple form into something truly petrifying. For those aiming for a high-end finish, tools like an airbrush allow for seamless gradients and fine details, elevating your custom Halloween mask to a professional standard. Finally, sealing your masterpiece protects your artistry, ensuring its horrifying impact endures through countless fright nights.
Beyond the Basics: Advanced Techniques and Personal Signature
Elevating Your Creation
As we ventured into transforming basic masks into professional props, we explored the nuances that set truly exceptional work apart. Integrating real hair, synthetic fur, or even tangible objects like artificial teeth or claws adds unparalleled realism and texture. Advanced effects, such as small LED lights for glowing eyes or even internal smoke dispensers, can imbue your mask with an otherworldly presence. Our own Krampus mask, which we made for a promotion for Phasmophobia, was a project that pulled a lot of our skills into one, adding electronics for the eyes, intricate hair work, and detailed sculpting. This kind of integration demonstrates the immense potential for creating a truly unique Halloween mask that captivates and terrifies. Beyond aesthetics, we always prioritize comfort and fit, ensuring internal padding, adjustable straps, and proper ventilation allow the wearer to fully embody their monstrous persona without discomfort.
Crafting with Impact, Not Just Budget
One of the most liberating aspects of this craft is that a limited budget should never be a barrier to creativity. We’ve shared strategies for sourcing materials affordably, encouraging the use of household items, recycled materials, and discounted art supplies. Learning to make your own substitutes for specialized materials, such as homemade paper maché clay, empowers you to create stunning DIY Halloween masks without breaking the bank. Prioritizing intricate detailing on impact areas and learning from comprehensive mask making tutorials helps maximize your resources and avoid costly mistakes, proving that resourcefulness is just as valuable as any expensive tool.
Your Legacy of Nightmare Begins
Ultimately, the journey of learning how to make a Halloween mask is about far more than just creating a prop; it’s about unleashing your unique spooky signature upon the world. It’s about the profound satisfaction of transforming a nightmare from your imagination into a tangible, horrifying reality. The biggest takeaway, from our collective experience at Devil’s Dreamworld, is that anyone can learn and do this. While it does take some skill to perfect, there are enough tools, resources, and helpful people in the community that gives anyone what they need to experiment for themselves. This vibrant community spirit encourages continuous learning and experimentation, fostering an environment where every new creation inspires the next.
So, whether your vision is of a classic undead ghoul, a twisted clown, or a futuristic xenomorph, the tools, techniques, and inspiration are now at your fingertips. We invite you to explore the extensive range of handmade horror masks, materials, and tutorials available at Devil’s Dreamworld to further ignite your passion. Which terrifying creation will you sculpt from the depths of your imagination and bring to chilling life?
Comments 0
Log in to leave a comment.