
diy halloween decorations outdoor scary: 7 Spooky Budget DIYs
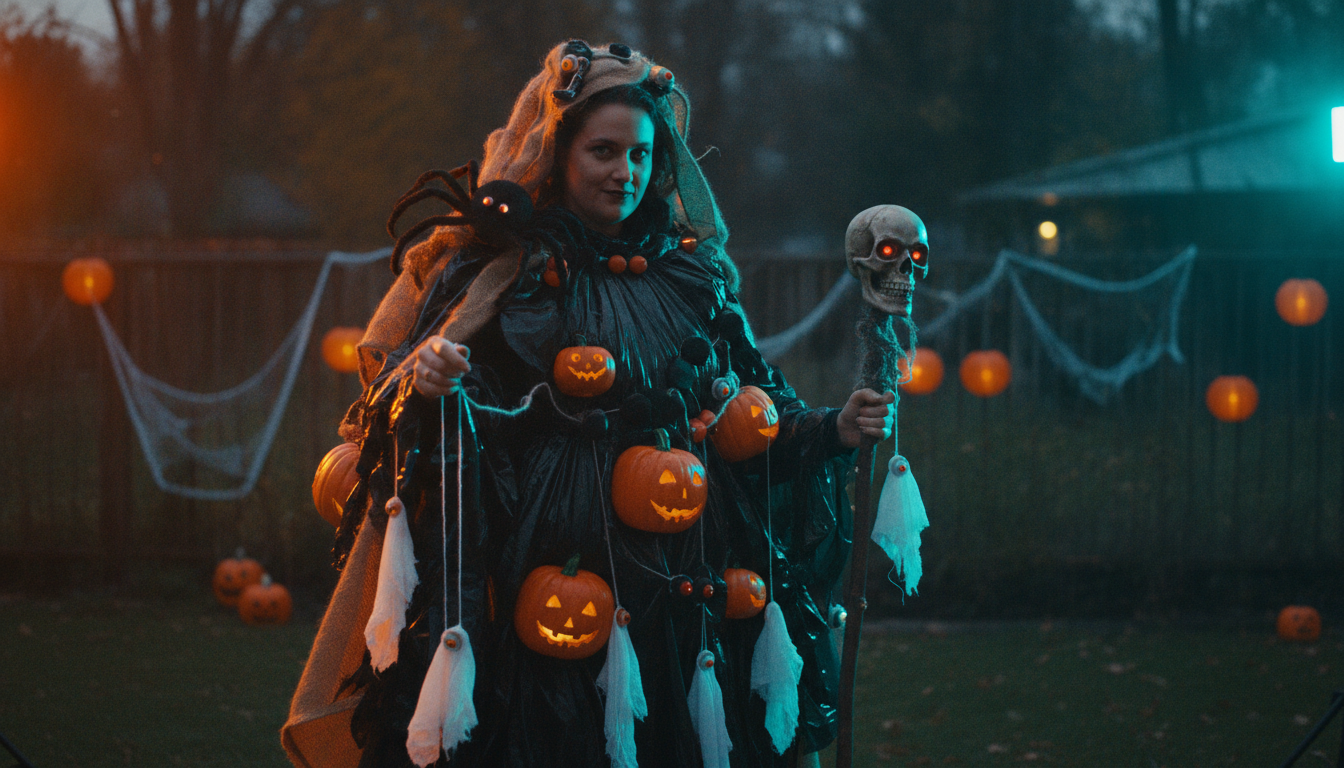
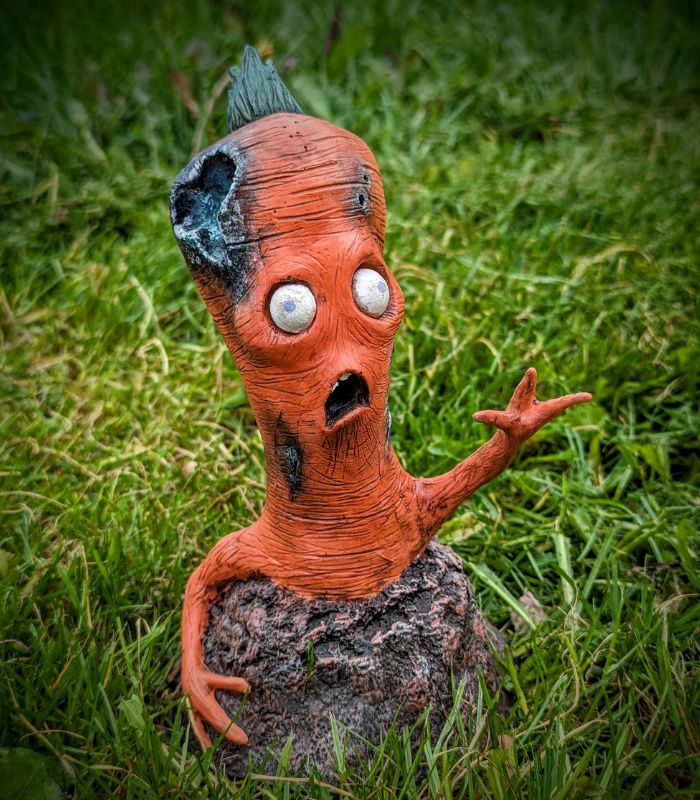
Want to turn your yard into the stuff of nightmares without emptying your wallet? Crafting truly terrifying outdoor Halloween decorations is easier than you think, and we’re here to show you exactly how to make DIY Halloween decorations outdoor scary enough to stop trick-or-treaters in their tracks. Here at Devil’s Dreamworld, we believe the best scares come from the heart, and a bit of clever crafting. We’ve always loved how simple materials can transform into genuinely unsettling creations; for instance, we once sculpted and hand-painted a Zombie Carrot garden ornament from resin, and it proved just how much eerie ambiance you can coax from unexpected places.
You don’t need a professional prop studio or a massive budget to achieve a bone-chilling yard display. Our approach leverages everyday items (think trash bags, cardboard, and PVC pipes) to conjure classic horror figures and sinister scenes that look anything but homemade. We’ve spent years in the workshop perfecting techniques to bring our own monstrous visions to life, and we’re excited to share how you can master these tricks for yourself, whether you’re creating a menacing reaper or a swarm of giant spiders.
This guide isn’t just about making individual props; it’s about transforming your entire outdoor space into a cohesive, haunting realm. We’ll walk you through creating an eerie atmosphere with strategic lighting and sound, and give you step-by-step instructions for crafting iconic spooks. Get ready to unleash your inner mad scientist, turning ordinary materials into ghoulish masterpieces that will make your yard the most terrifying attraction on the block this Halloween.
Get ready to transform your yard into the most haunting spectacle on the block without breaking the bank! These key takeaways reveal how simple materials and a touch of creativity can unleash terrifyingly good DIY outdoor Halloween decorations.
- Embrace Budget-Friendly Frights: Achieve maximum scare impact with minimal spending using readily available and inexpensive materials like trash bags, cardboard, and PVC pipes.
- Unleash Everyday Materials for Horrors: Discover how ordinary household items can become the versatile foundation for truly terrifying and unique outdoor Halloween props.
- Master the Eerie Ambiance: Learn to strategically use lighting, fog machines, and sound effects to elevate your DIY creations into a truly immersive and chilling haunted scene.
- Craft Iconic Spooks with Ease: Follow simple step-by-step guides to bring classic scary figures like floating ghosts, creepy zombies, giant spiders, and menacing reapers to life in your yard.
- Transform Your Yard into a Haunted Realm: Get inspired to convert your front yard, porch, and entryway into a cohesive and chilling Halloween spectacle that tells a spooky story.
- Cardboard: Your Secret Weapon for Spooky Shapes: Harness the incredible versatility of cardboard to construct detailed, durable, and surprisingly impactful scary props, proving that high fright doesn’t require high cost.
Ready to bring these frightful visions to life? Dive into our step-by-step guides and unleash your inner mad scientist, turning everyday materials into ghoulish masterpieces that will leave your trick-or-treaters screaming for more!
Setting the Scene for DIY Scary Outdoor Halloween Decorations
Why DIY Your Outdoor Halloween Frights?
Here at Devils Dreamworld, we know that nothing quite compares to the thrill of creating something truly terrifying with your own hands. When it comes to diy halloween decorations outdoor scary, the advantages are undeniable, offering unparalleled satisfaction that store-bought items simply can’t match.
Crafting your own outdoor Halloween decorations allows for complete customization, transforming your yard into a unique, one-of-a-kind haunted realm. It’s about bringing your monstrous visions to life, tailored exactly to your space and scare ambitions. Beyond the creative freedom, embracing DIY also offers significant cost savings, ensuring your display stands out without breaking the bank.
Unleashing the Power of Everyday Materials for Halloween Frights
One of the core secrets to truly terrifying yet budget-friendly Halloween decor, in our workshop experience, is the clever use of readily available materials. We’ve found that you don’t need expensive craft supplies to achieve high impact. Common household items and inexpensive supplies like trash bags, PVC pipes, cardboard, and old clothes become the versatile foundation for your most horrifying creations.
This approach proves that high fright doesn’t require high cost, making it ideal for those wondering how to make cheap scary outdoor Halloween decorations. These ordinary materials, when used creatively, can be transformed into incredibly effective spooky outdoor props. This method allows us to focus on maximizing the ‘scare factor’ with basic items, perfect for busy individuals seeking quick-to-assemble, high-impact designs.
The Art of the Eerie Atmosphere: Beyond Just Props
While impressive props are crucial, the magic of a truly frightening Halloween display, for us, lies in the overall atmosphere. We always consider how each individual DIY contributes to a cohesive eerie ambiance through strategic lighting, sound, and placement. It’s not just about the items themselves, but how they interact to create a unified sense of dread.
Mastering the eerie ambiance from the start elevates individual DIYs into a haunting experience, preparing visitors for the frights to come. This foundational understanding ensures that your yard doesn’t just have scary outdoor Halloween props DIY, but rather a fully immersive and terrifying Halloween frights display. Think of it as painting a picture of terror, where every element works together.
DIY Scary Outdoor Halloween Decoration #1: Ghastly Floating Ghosts
Materials for Your Homemade Spooky Yard Decor
- White trash bags or old white sheets
- Styrofoam balls or small inflatable balloons for heads
- Wire hangers or PVC pipe scraps for arms
- String or fishing line
- Black marker or paint for faces
Step-by-Step for These Easy Outdoor Halloween Crafts
Conjuring spectral figures that appear to float menacingly in your yard is surprisingly simple and creates fantastic diy halloween decorations outdoor scary. Start by forming the head with a Styrofoam ball or a small balloon, drawing a haunting face with a black marker or paint. We often find that simplicity in facial features maximizes the unsettling effect.
Next, drape your white trash bag or sheet over the head, allowing it to fall naturally. For outstretched arms, bend wire hangers into arm shapes or use short PVC pipe scraps, securing them inside the ghost’s body with tape or string. Finally, attach fishing line to the top of the head or shoulders, ready for hanging. This creates easy outdoor Halloween crafts that are remarkably effective.
Placement Tips for Maximum Scare Impact
Discovering the best spots in your yard to hang your floating ghosts is key to maximizing their eerie effect. We recommend varying heights and positions to create a dynamic, ethereal scene, perhaps giving the illusion of a ghostly procession. Suspend them from tree branches, porch overhangs, or even from wires strung across your yard.
Consider backlighting your ghosts with a subtle, cool-toned light to enhance their spectral appearance at night. Placing them where the wind can gently sway them adds an element of natural, unpredictable movement, making these homemade spooky yard decor items feel incredibly lifelike and unnerving. This thoughtful placement ensures your easy outdoor Halloween crafts truly deliver on fright.
DIY Scary Outdoor Halloween Decoration #2: Menacing PVC Pipe Reapers
Gathering Craft Supplies for This Halloween Fright
- PVC pipes (various lengths for body and scythe)
- PVC connectors (elbows, tees)
- Duct tape or zip ties
- Black trash bags, dark fabric, or old clothes
- Foam skull or painted gallon jug for the head
- Optional: black spray paint for PVC
Building Your Reaper: A Step-by-Step Guide for Scary Outdoor Halloween Props
Constructing a sturdy, towering reaper figure using readily available PVC pipes is one of our favorite ways to create impactful diy halloween decorations outdoor scary. We typically start with a vertical pipe for the body, adding horizontal pieces with elbow connectors for shoulders and a tee connector for the pelvis. Ensure your base is stable; you might need a cross-shaped base or to secure the pipe into the ground.
For the intimidating scythe, attach a longer PVC pipe arm with an elbow, then secure a curved piece (perhaps from a thicker PVC section or even a cardboard cutout) to form the blade. A bit of black spray paint on the PVC beforehand can give a more seamless, menacing look. This provides a step-by-step guide for scary outdoor Halloween props that stand tall and truly command attention.
Adding Clothes and Detailing for a Terrifying Look
Transforming your PVC frame into a truly menacing entity requires attention to detail. We drape it generously in black trash bags or dark, tattered fabric, securing it with duct tape or zip ties to create voluminous, flowing robes. To create truly eerie effects, consider layering different shades of dark fabric or even using burlap for a more weathered, ancient look.
For the head, a foam skull works perfectly, or a painted gallon jug can be surprisingly effective. Adding glowing LED eyes (simple battery-operated tea lights placed inside) peering out from beneath the hood instantly ups the scare factor. Posing the reaper with its scythe raised, as if mid-swing, maximizes its frightening presence, making this one of your most impactful scary outdoor Halloween props DIY. For added effect, a fog machine nearby can make it appear as though it’s emerging from mist, turning your yard into a truly haunted yard display.
DIY Scary Outdoor Halloween Decoration #3: Creepy Crawly Giant Spiders
What You Need for These Budget Halloween Yard Decorations
- Black trash bags or black fabric
- Pool noodles, pipe insulation, or newspaper for legs
- Styrofoam ball or plastic container for the body
- Wire or hot glue gun
- Red paint or googly eyes
Assembling Your Oversized Arachnid
Creating terrifyingly huge spiders that will make anyone’s skin crawl is a fantastic example of effective diy halloween decorations outdoor scary. For the body, we typically use a large Styrofoam ball or a plastic container, which provides a good base. Wrap it securely in black trash bags or fabric, sealing with hot glue or tape to create a dark, ominous form.
For the legs, cut pool noodles or pipe insulation into varying lengths, then bend them to create jointed segments. Secure these to the body using a hot glue gun or by poking holes and threading wire through for extra stability. We always give our arachnids bright red eyes for that classic menacing stare, often painting them on or using large googly eyes for a cartoonish, yet still unsettling, effect. This makes for budget Halloween yard decorations with undeniably big impact.
Web Placement and Lighting for an Effective Trick-or-Treat Scene
To truly enhance your creepy crawly giant spiders, strategic web placement and lighting are essential for an effective trick-or-treat scene. We recommend stretching fake spider webbing (or even simple cotton batting) across bushes, doorways, and between trees, making it appear as if your oversized arachnids have spun a vast, inescapable trap.
Discover lighting tricks to cast dramatic, eerie shadows, making it appear as though these eight-legged monsters are lurking in wait for unsuspecting trick-or-treaters. A single spotlight from below can make them look colossal and menacing, transforming your space into a spooky outdoor props showcase. This thoughtful arrangement creates a truly immersive and frightening scene for your halloween frights.
DIY Scary Outdoor Halloween Decoration #4: Graveyard Zombies & Decomposing Corpses
Materials for a Ghoulish Graveyard on a Budget
- Old clothes, shredded fabric, or burlap
- Newspaper, foam, or stuffing for body forms
- Plastic bags or old bottles for heads
- Stakes or rebar for support
- Dirt, leaves, and other natural elements
Crafting Your Zombie Horde: Simple DIY Halloween Yard Ideas for a Fright
Populating your yard with an army of the undead is a classic and highly effective way to create diy halloween decorations outdoor scary. We’ve found that using inexpensive materials like old clothes and newspaper allows us to craft decomposing bodies and shambling zombies with remarkable realism. Start by stuffing old clothing with newspaper or plastic bags to create a rudimentary body form, focusing on grotesque shapes.
For the heads, crinkle plastic bags around an old bottle or crumpled newspaper, then cover with a thin layer of old fabric or even a simple papier-mâché mix for texture. Drawing on gruesome faces with black and green paint, complete with sunken eyes and gaping mouths, brings these creatures to un-life. This addresses how to create a haunted graveyard or zombie display on a budget, offering simple DIY Halloween yard ideas for a fright.
Making Your Zombies Look Fresh from the Grave
To truly make your zombies look fresh from the grave, explore techniques for distressing fabrics and applying “dirt” and “blood” effects. We recommend tearing and fraying clothing aggressively, then misting it with a dilute mixture of brown and black paint to simulate grime and decay. A touch of red paint, sparingly applied, can suggest dried blood, but don’t overdo it: subtlety often enhances the horror.
Position your zombies to suggest they’ve just clawed their way out of the earth, with hands reaching up from hidden spots or bodies partially buried. Securing them to stakes or rebar ensures they remain upright and menacing throughout the night. This section is all about transforming your Devils Dreamworld into a truly haunted yard display with realistic, budget-friendly scary outdoor halloween props DIY.
DIY Scary Outdoor Halloween Decoration #5: Cardboard Tombstones & Frightful Markers
Cardboard: Your Secret Weapon for Spooky Shapes
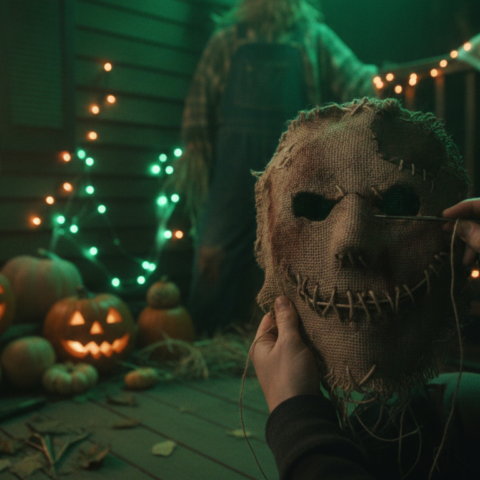
Unlock the incredible potential of cardboard as a versatile, cost-effective material for creating durable and impactful Halloween props. In our experience, cardboard is an essential item for DIY Scarecrow Masks and props because it’s readily available, easy to cut, and surprisingly resilient when treated correctly. This material allows for rapid prototyping and mass production of scary outdoor Halloween props DIY.
Cardboard provides the perfect canvas for achieving intricate shapes and details without the need for specialized tools or expensive materials. We’ve used it for everything from small accents to large freestanding figures, proving that cardboard is truly your secret weapon for spooky shapes and fantastic cardboard halloween decorations. It’s an ideal choice for anyone looking for simple DIY Halloween yard ideas for a fright.
Designing and Cutting Your Cardboard Halloween Decorations
- Large cardboard boxes (appliance boxes are great!)
- Box cutter or utility knife
- Ruler and pencil
- Gray, black, and white paint
- Sealant (optional, for weatherproofing)
- Stakes or support for stability
Learn how to design classic and unique tombstone shapes by sketching them directly onto large cardboard boxes. Appliance boxes, in particular, provide ample material for impressive sizes. We then carefully cut them precisely using a sharp box cutter or utility knife, always on a protected surface.
Adding chilling inscriptions or designs like “R.I.P.” or humorous epitaphs with a pencil before painting helps guide your hand. For stability, leave tabs at the bottom to fold and tape to a stake, or hot glue small wooden dowels to the back. This section provides invaluable tips for stability and preventing your cardboard halloween decorations from warping, ensuring they stand tall as spooky outdoor props.
Weatherproofing and Painting Tips for Grave Details
Discover techniques for making your cardboard tombstones look like aged, weathered stone. We often start with a base coat of dark gray, then dry-brush lighter grays and whites to simulate worn edges and raised textures. A touch of mossy green paint can add to the ancient, decaying look.
For added durability, especially in the unpredictable UK weather, we recommend a sealant. A clear matte spray sealant offers excellent protection against moisture without altering the finish. Ensuring your graves are ready to withstand the elements transforms simple cardboard into compelling spooky outdoor props, elevating your overall haunted yard display.
DIY Scary Outdoor Halloween Decoration #6: The Unsettling Hanging Cage Prop
Building a Simple, Yet Terrifying Structure
- PVC pipe or thin wooden dowels
- Zip ties or strong tape
- Black spray paint
- Plastic chains (optional)
- Old skeleton prop or mannequin head
Constructing an eerie hanging cage from PVC pipes or similar materials is a straightforward guide to creating a skeletal frame that instantly creates diy halloween decorations outdoor scary. We typically start with four vertical PVC pipes forming the corners, connected by shorter horizontal pieces at the top and bottom with elbow connectors. Zip ties or strong tape secure the joints, creating a sturdy, yet light, structure.
A quick coat of black spray paint makes the cage disappear into the night, emphasizing its chilling contents. Adding plastic chains, also painted black, enhances the illusion of a heavy, rusted prison. This basic framework serves as a standout element of your scary outdoor Halloween props DIY, promising an unsettling visual for all who pass by.
Adding a Gruesome Inhabitant: The Prisoner Within
Whether you choose a pre-made skeleton, a homemade dummy, or something uniquely terrifying, the prisoner within your cage is key to maximizing fright. For us, experimenting with unique scares is always exciting. We once adapted a Zombie Carrot garden ornament, made from resin and hand painted, to create a truly bizarre and disturbing captive for a cage, repurposing it for maximum fright.
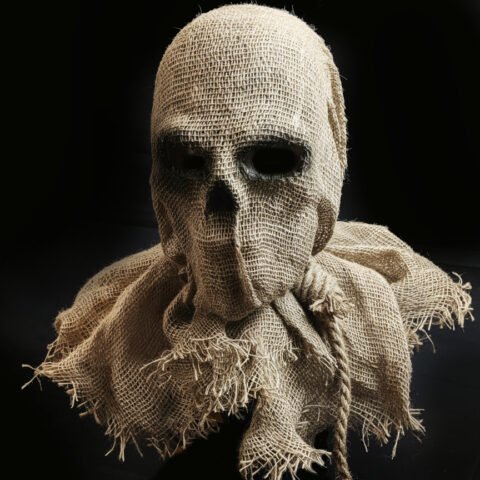
You might consider using elements like a Grinning Scarecrow Mask or a Scarecrow Mask with Stitched Mouth for your captive’s face, creating an unsettling expression that haunts onlookers. Drape torn rags or burlap around your inhabitant to suggest a long, arduous imprisonment. The goal is to make your cage’s prisoner appear truly desperate and disturbing, turning a simple prop into a compelling narrative of horror.
Placement for Chilling Impact and Visual Storytelling
Strategically hanging your cage in a prominent location is crucial for immediate visual impact. We suggest near your porch, an entryway, or even from a sturdy tree branch where it can sway ominously. Consider how height and surrounding elements can enhance the terror; a low-hanging cage forces visitors to confront its contents directly, while a higher one creates a sense of dread as they pass beneath.
Positioning a spotlight directly on the cage or from below can cast dramatic shadows, making the prisoner appear more dynamic and alive. This thoughtful placement ensures your chilling prop contributes to a cohesive haunted yard display, effectively communicating a horrifying story to every trick-or-treater.
DIY Scary Outdoor Halloween Decoration #7: Blood-Splattered Window Silhouettes
Materials for a Quick Fright
- Black poster board or trash bags
- Scissors
- Tape
- Red paint or fake blood (for splatters)
For a quick, high-impact scare, learning how to create terrifying silhouettes for your windows is an excellent choice among diy halloween decorations outdoor scary. This method delivers maximum fright with minimal effort, making it one of the easiest outdoor Halloween crafts to implement. We often turn to this when time is short but the desire for terror is high.
The beauty of silhouettes lies in their simplicity; they rely on suggestion rather than intricate detail to provoke fear. Using readily available materials like black poster board ensures this project remains budget-friendly and accessible for everyone. It’s a classic scare tactic that never fails to get a jump out of passersby.
Creating Menacing Shapes for Your Windows
From shadowy figures with outstretched arms to monstrous faces peering out, this section guides you through designing and cutting effective silhouettes. We recommend sketching your desired shape lightly on black poster board before cutting. Simplicity is key; exaggerated features like clawed hands or wide-open mouths are often more effective than intricate details.
Experiment with different monster shapes, like those found in homemade Halloween masks, to create a variety of unsettling scenes. A figure standing eerily still, or one that appears to be pressing against the glass, creates a powerful sense of an unseen threat. Secure your finished silhouettes to the inside of your windows with tape, ready for the magic of backlighting.
Backlighting for a Truly Eerie Effect
The secret to frightening window silhouettes is effective backlighting, which truly transforms them into spooky outdoor props. We always position a light source directly behind the silhouette, inside your home, to make your cutouts appear truly menacing and alive. A single lamp or even string lights placed strategically can create this dramatic effect.
Consider using a red or green bulb for an extra layer of chilling color, enhancing the eerie atmosphere. This technique makes it look as though something truly monstrous is lurking within your home, preparing to break free. Proper backlighting transforms simple pieces of cardboard into captivating elements of your halloween frights display.
Mastering the Eerie Ambiance: Elevating Your Haunted Yard Display
Strategic Lighting: Casting Shadows and Spotlighting Horrors
Beyond the props themselves, proper lighting is paramount for a truly eerie atmosphere, especially for diy halloween decorations outdoor scary. We employ techniques for uplighting your DIYs, casting dramatic shadows that twist ordinary shapes into grotesque forms. A well-placed spotlight can instantly elevate a simple ghost or zombie into a terrifying spectacle.
Using colored lights, like deep reds or sickly greens, can evoke different moods, from blood-soaked scenes to an otherworldly glow. From flickering lanterns suggesting ancient spirits to focused spotlights highlighting your most terrifying creations, strategic lighting guides the eye and amplifies the fear. This deliberate illumination turns your yard into a captivating stage for halloween frights.
Sound Effects: The Soundtrack to Your Halloween Frights
Adding another layer of terror with a carefully chosen soundscape is essential for an immersive haunted yard display. We explore options for spooky sound effects, from chilling cackles and howling wolves to ghostly moans and creaking doors. These auditory elements are critical for fully engaging visitors’ senses.
We’ve found that strategically placing hidden speakers ensures your sound effects emanate from unexpected directions, enveloping your visitors in the halloween frights of your making. A low, continuous hum or distant thunder can create an underlying sense of unease, while sudden, loud noises provide jump scares. For further reading on creating soundscapes, consider resources like Sound On Sound’s guide to mastering sound design.
Fog Machines: Adding Mystique and Motion to Your Spooky Outdoor Props
A fog machine can instantly transform your yard into a mysterious, unsettling landscape, enhancing your spooky outdoor props. This section covers tips for using fog effectively, creating low-lying mist that swirls around your decorations, obscuring their bases and adding an element of the unknown. We often find that fog works best when it’s just thick enough to be atmospheric without completely hiding your carefully crafted diy halloween decorations outdoor scary.
Fog adds a sense of motion and mystique, making your props appear to emerge from an otherworldly veil. Positioning the fog machine strategically, perhaps near a fan, can help distribute the mist evenly throughout your haunted yard display. This simple addition can significantly elevate the impact of your scene, turning an ordinary yard into a truly otherworldly experience.
Transforming Your Front Yard into a Cohesive Haunted Realm
Storytelling with Your Scary Outdoor Halloween Props DIY
Don’t just place props; tell a story. This section encourages readers to think about a theme or narrative for their display, transforming individual scary outdoor Halloween props DIY into a cohesive experience. Whether it’s a zombie apocalypse, a haunted graveyard, or a scarecrow invasion with props like the Skull Scarecrow Mask, a central theme ties everything together.
Learn how to arrange your scary outdoor Halloween props DIY elements to create a logical, chilling journey for visitors. A coherent narrative elevates your budget Halloween yard decorations from a collection of items to an immersive world. This thoughtful approach deepens the scare factor, making the experience more memorable and impactful for trick-or-treaters and guests.
Arranging Your Budget Halloween Yard Decorations for Impact
Discover principles of composition and flow to arrange your homemade spooky yard decor effectively. We always consider creating focal points, such as a towering reaper or a gruesome tableau, to immediately draw the eye. Pathways should be lined with smaller, unsettling elements that build anticipation.
Think about transitions between different scenes, ensuring a continuous sense of dread rather than abrupt shifts. For instance, a graveyard might transition into a zombie outbreak area. This careful arrangement maximizes visual impact and ensures every corner of your yard contributes to the eerie atmosphere, making your diy halloween decorations outdoor scary truly shine.
Creating a Terrifying Trick-or-Treat Scene
Focusing on the entryway and path leading to your door is paramount for creating a terrifying trick-or-treat scene. We provide specific strategies for making the experience unforgettable, and terrifying, from the moment visitors step onto your property. Use hanging elements like floating ghosts to create an immediate sense of unease.
Line the path with flickering lights and small, easily missed details like severed hands or glowing eyes peeking from bushes. This ensures a memorable trick-or-treat scene, where every step brings a new fright. Integrating sounds and low-lying fog along the path also amplifies the scare, culminating in a truly spooky encounter at your front door.
Safety First & Durability Tips for Your Homemade Spooky Yard Decor
Securing Your Decorations Against Wind and Weather
Ensuring your hard work lasts through the Halloween season is crucial for all diy halloween decorations outdoor scary. Learn best practices for staking down props, weighing bases, and choosing weather-resistant materials or applying sealants. For larger, freestanding items like PVC reapers, we recommend driving rebar into the ground and sliding the PVC pipe over it for superior stability.
For DIY Halloween masks and large cardboard items, a clear exterior spray sealant is a must to protect against rain and dampness. High winds are a perennial challenge, so securing flying ghosts with multiple anchor points, perhaps even fishing line tied to heavy stones, prevents them from becoming lost. Investing a little extra effort here prolongs the life of your decorations.
Child and Pet Safety Considerations for Your Display
Prioritizing the safety of trick-or-treaters and your own family is paramount for any homemade spooky yard decor. We always discuss safe placement of electrical cords, ensuring they are properly secured and covered to avoid tripping hazards. All props should be securely anchored and free of sharp edges that could cause injury.
Avoid placing small, easily detachable parts where curious children or pets might ingest them. Additionally, consider the fright level for younger visitors; some elements might need to be toned down or placed out of direct reach for very young children. A well-designed display is both terrifying and safe for everyone, ensuring a positive experience for all participants.
Storing Your Creations for Next Year’s Frights
Tips for dismantling, cleaning, and storing your DIY Halloween decorations will ensure they bring fear and delight for many seasons to come. We recommend labeling boxes for easy retrieval next year, perhaps grouping items by theme or type. For fabric props, a quick wash or airing out can prevent mildew and unpleasant odors.
Carefully disassemble larger structures like PVC reapers, storing pipes and connectors in labeled bags. Cardboard elements, if weatherproofed, can often be stacked flat in a dry area. Maximizing the longevity of your budget Halloween yard decorations with smart storage solutions makes future Halloween setup much quicker and more cost-effective. For advice on general seasonal decor storage, see resources like Better Homes & Gardens’ guide to holiday storage.
Unleashing Your Inner Ghoul: The Enduring Thrill of DIY Halloween
As we draw the curtain on our journey through the realm of diy halloween decorations outdoor scary, it becomes abundantly clear that crafting your own frights is far more than a seasonal chore; it’s an exhilarating expression of personal passion, boundless creativity, and the undeniable satisfaction of bringing your darkest visions to life. We’ve ventured through an array of methods, from conjuring spectral figures to erecting towering reapers, each step designed to empower you to transform your ordinary yard into an extraordinary spectacle of terror. Here at Devils Dreamworld, we genuinely believe that the most impactful scares are those imbued with a piece of the maker’s soul, creations born from ingenuity and a touch of the macabre. This guide has armed you with the essential techniques, material insights, and atmospheric considerations necessary to not just decorate, but to truly haunt.
The Undeniable Power of Personalised Terror
Beyond the Store-Bought Scare
The allure of DIY Halloween, as we’ve explored, lies in its unparalleled capacity for customization. Unlike mass-produced items, your handmade spooky yard decor tells a unique story, tailored precisely to your space and scare ambitions. This bespoke approach allows for a level of thematic cohesion and intricate detail that store-bought items simply cannot rival. We’ve found that the process of transforming common household materials (like humble trash bags, versatile PVC pipes, and discarded cardboard) into high-impact frights offers a singular sense of accomplishment. This ingenuity not only unlocks immense creative freedom but also proves that a truly terrifying display doesn’t have to decimate your budget. The satisfaction of crafting a unique, one-of-a-kind haunted realm with your own hands, knowing every ghoul and gravestone is a product of your imagination, is an irreplaceable reward that fuels our own creative endeavors in the workshop.
Weaving the Web of Dread: Atmosphere as Your Ally
Illuminating and Amplifying Fear
While individual props hold their own sinister charm, the true magic of a memorable haunted yard display, in our experience, emanates from a meticulously crafted atmosphere. We’ve underscored how strategic lighting, unsettling soundscapes, and dramatic fog are not mere accessories, but foundational elements that elevate your diy halloween decorations outdoor scary from a collection of items to an immersive, sensory experience. Uplighting your DIYs can cast dramatic, twisting shadows, turning familiar shapes into grotesque forms, while colored lights, deep reds for a blood-soaked scene or sickly greens for an otherworldly glow, can instantly shift the mood. A continuous low hum, distant thunder, or sudden, chilling cackles emanating from hidden speakers (for further reading on soundscapes, consider resources like Sound On Sound’s guide to mastering sound design) truly engage the auditory senses, enveloping visitors in a palpable sense of dread. And then there’s the mystique of a fog machine, transforming your yard into an ethereal, unknown landscape where ghouls seem to emerge from an otherworldly veil, adding motion and an unpredictable element to your spooky outdoor props. This holistic approach ensures every element works in concert, painting a terrifying picture that lingers long after trick-or-treaters have departed.
From Concept to Nightmare: Crafting Your Signature Frights
A Gallery of Ghoulish Possibilities
Through the course of this guide, we’ve provided detailed blueprints for a diverse range of handmade spooky yard decor, each designed to inspire and ignite your imagination. From the ethereal movement of easy outdoor Halloween crafts like ghastly floating ghosts, swaying menacingly in the breeze, to the imposing presence of menacing PVC pipe reapers, commanding attention with their looming scythes, we’ve demonstrated the power of simple materials. We’ve shown how to create creepy crawly giant spiders that spin vast webs across your yard, turning familiar spaces into arachnophobes’ worst nightmares. The guide also delved into populating your graveyard with realistic zombies and decomposing corpses, clawing their way from the earth, and marking their resting places with durable cardboard halloween decorations designed to withstand the elements. However, it’s in the realm of truly unique scares that our hearts at Devil’s Dreamworld often find the most sinister joy. For instance, when constructing an unsettling hanging cage prop, while a simple skeleton works, we’ve found that adapting items like our Zombie Carrot garden ornament, made from resin and hand painted, can create a bizarre and uniquely disturbing captive, repurposing its existing horror for maximum fright. Similarly, using a Grinning Scarecrow Mask or a Scarecrow Mask with Stitched Mouth for your prisoner’s face can imbue your captive with an unsettling expression, crafting a compelling narrative of horror. Finally, the simplicity of blood-splattered window silhouettes, illuminated from within, offers a quick yet high-impact scare, proving that suggestive terror can be just as potent as intricate detail. Each project, from the most elaborate to the most understated, offers a unique opportunity to infuse your personal brand of horror into your Halloween landscape.
Building to Last, Scaring with Care: Practicalities for Persistent Terror
Ensuring Longevity and Safety
Our commitment to DIY extends beyond a single Halloween night; we want your creations to bring fear and delight for many seasons to come. This means prioritizing durability and, crucially, safety. We’ve detailed best practices for securing your decorations against unpredictable elements, from driving rebar into the ground for towering PVC reapers to applying clear matte spray sealant to weatherproof your DIY Scarecrow Masks and cardboard creations. High winds are a perennial challenge in the UK, so employing multiple anchor points for floating ghosts is essential to prevent them from becoming lost spirits. Beyond longevity, the safety of trick-or-treaters and your own family remains paramount. We always stress the importance of secure electrical cords, the absence of sharp edges on props, and mindful placement of small, detachable parts away from curious hands or paws. A truly terrifying display is one that is both impactful and safe for all who encounter it. And when the haunting season concludes, smart storage practices, dismantling structures, cleaning fabric elements to prevent mildew, and carefully labeling boxes (for general advice, see resources like Better Homes & Gardens’ guide to holiday storage), ensure your budget Halloween yard decorations are preserved, ready to unleash their frights anew next year, making future Halloween setups both quicker and more cost-effective.
Your Haunted Horizon Awaits
The journey from concept to a fully realized, terrifying outdoor display is an immensely gratifying one, transforming your passion for Halloween into a tangible spectacle that brings joy, and screams, to your community. We’ve shown that with a little creativity, everyday materials, and the techniques shared, anyone can craft truly memorable and terrifying scenes. This approach empowers you to curate a cohesive narrative, perhaps a zombie apocalypse with a Skull Scarecrow Mask leading the horde, or a haunted graveyard where every tombstone tells a chilling tale. The power to design, build, and orchestrate such a realm of fright lies firmly in your hands. Continue to experiment, draw inspiration from the darkest corners of your imagination, and let your yard become the talk of the town. For more inspiration, tutorials, and quality supplies to fuel your next terrifying creation, explore the depths of Devil’s Dreamworld. Which chilling narrative will you bring to life next to mesmerize and terrify your neighborhood?

Comments 0
Log in to leave a comment.