
Homemade Halloween Masks: Ultimate Guide & 7 Spooky Ideas
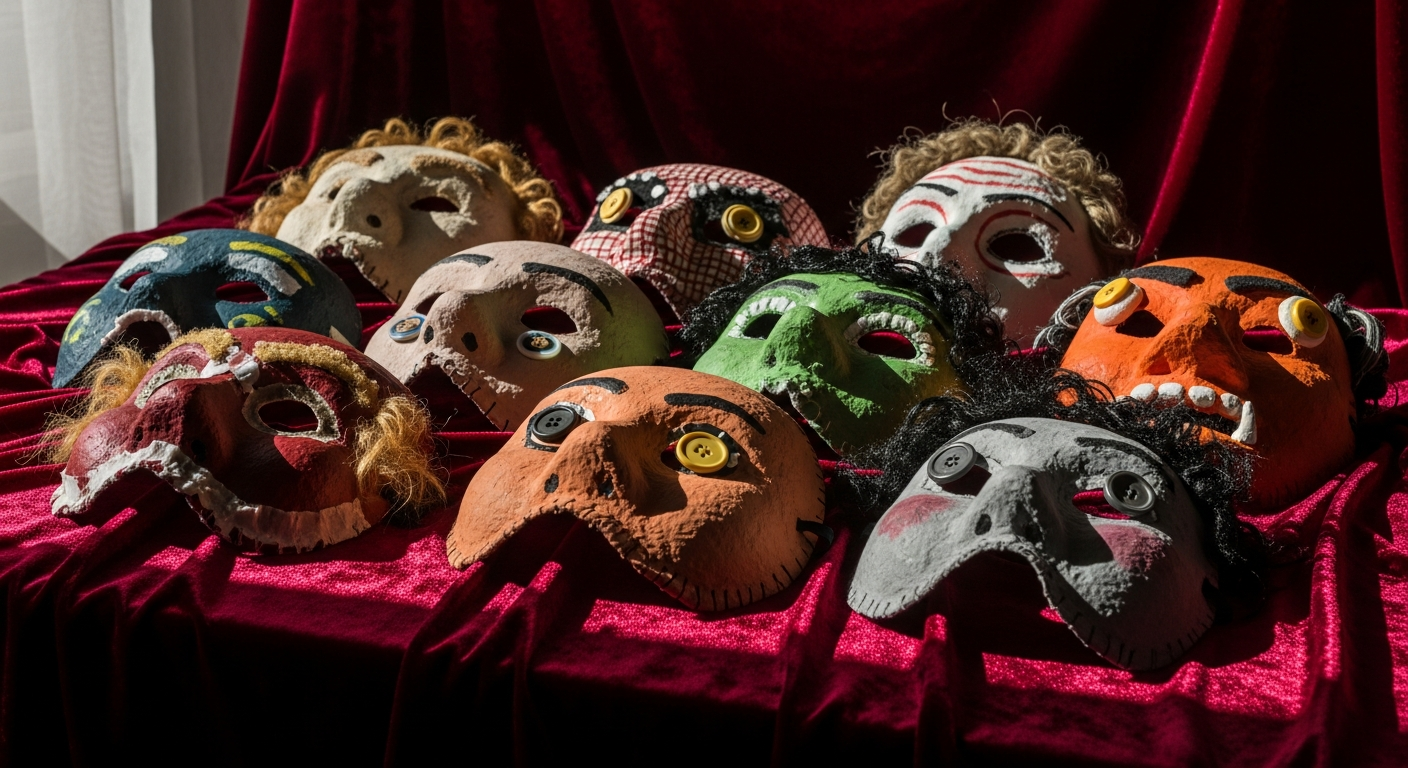
Dispelling a common myth right away: making your own terrifying disguise is far from a hard process. In fact, anyone can craft incredible homemade Halloween masks right in their own home. We’ve seen firsthand the immense satisfaction, not just in the creation, but in the reaction, like when we created 22 unique masks for the game Phasmophobia, and witnessing people online open their gift boxes to reveal our work was an unforgettable feeling. That pure enjoyment is exactly what fuels us at Devil’s Dreamworld, proving a handmade mask beats a store-bought one every time.
From simple and fun to truly horrifying, crafting your own mask unlocks unparalleled creative freedom. We’ve found that for those just starting out, paper mache offers the easiest entry point, allowing you to build basic forms quickly. As you gain confidence, you can transition into more intricate air dry clay sculpts, eventually progressing to making plaster moulds for latex masks, which is where things get really exciting. Throughout the journey, remember what we’ve learned in our workshop: good sculpting tools are essential, and for mould making, a collection of cheap chip brushes will be your best friend. And a crucial tip when working with clay for a plaster mould? Be meticulous; the mould will pick up almost every detail, right down to your fingerprints!
This ultimate guide is designed to empower you with the techniques and inspiration needed to bring any vision to life, whether you’re a seasoned crafter or picking up your first lump of clay. We’ll explore diverse materials, provide step-by-step instructions for various skill levels, and share seven spooky ideas to ignite your imagination. Let’s make this Halloween unforgettable with a mask that’s uniquely, chillingly yours.
Homemade Halloween Masks: Key Takeaways
Preparing for Halloween means embracing creativity, and what better way to do that than crafting your own spooky disguise? Our ultimate guide to homemade Halloween masks will equip you with the knowledge and inspiration to create unforgettable looks for all ages and skill levels. Dive into the key insights below that highlight the journey from concept to eerie reality.
- Embrace Diverse Materials for Unique Looks: Discover the power of paper, paper mache, foam, and even latex to craft masks with varying textures and levels of complexity.
- Match Your Skill with Easy to Advanced Projects: Whether you’re a beginner or an experienced crafter, find step-by-step guides for simple, quick designs or intricate, realistic creations.
- Unleash Creativity with Personalized Touches: Learn how decoration, paint, and accessories can transform basic forms into captivating, one-of-a-kind Halloween art that truly stands out.
- Craft on a Budget Without Compromise: Utilize readily available, affordable materials to make stunning masks that look professionally done without the hefty price tag.
- Master Techniques for Every Vision: From quick assembly to detailed sculpting and molding, gain the skills to bring any mask idea to life with confidence and precision.
- Find Inspiration for All Ages and Styles: Explore a wide range of mask ideas suitable for both adults and kids, ensuring a perfect spooky, funny, or fantastical look for everyone.
With these foundational insights, you’re ready to transform simple materials into spectacular Halloween masks. In the following sections, we’ll delve deeper into specific materials, provide detailed step-by-step instructions, and share seven spooky ideas to ignite your imagination, ensuring your homemade mask is the talk of the night.
The Art of Crafting Homemade Halloween Masks: A Devil’s Dreamworld Perspective
There’s an undeniable magic in creating something with your own hands, especially when it comes to transforming into a different persona for Halloween. Here at Devil’s Dreamworld, we deeply appreciate the dedication and creativity that goes into crafting homemade Halloween masks. It’s a journey we know well, filled with both challenges and immense satisfaction. Many people think mask making is a hard process, but in our experience, anyone can make incredible masks at home with the right guidance and a bit of practice.
The beauty of making your own Halloween mask lies in its uniqueness. You’re not just wearing a costume; you’re embodying a character meticulously brought to life through your personal vision and effort. From simple designs for a quick fright to complex, realistic monster masks, the possibilities for DIY Halloween masks are truly endless, limited only by your imagination and willingness to learn new techniques.
We’re here to share our workshop secrets, guiding you through various techniques from the beginner-friendly to those requiring a bit more skill and patience. Our goal is to empower you to create stunning homemade Halloween masks that will stand out and leave a lasting impression, whether you’re aiming for spooky, silly, or spectacularly realistic.
Essential Materials and Tools for Your Mask-Making Journey
Before diving into the exciting world of crafting Devil’s Dreamworld quality masks, it’s crucial to gather the right materials and tools. The foundation of any great mask lies in having the proper equipment, allowing for precision, durability, and comfort. We’ve found that investing in good quality supplies from the start significantly enhances the crafting experience and the final outcome of your homemade Halloween masks.
Gathering Your Basic Toolkit
Every artist, no matter their medium, relies on a core set of tools. For mask making, our essential toolkit begins with items like sharp utility knives or craft blades for precise cutting, and a good pair of scissors. Sandpaper in various grits will be invaluable for smoothing surfaces, while mixing bowls and stir sticks are necessary for preparing materials like plaster and latex. A reliable respirator and gloves are also crucial for safety, especially when working with certain chemicals or fine dust.
Beyond the basics, we always recommend having an assortment of brushes. Small, fine-tipped brushes are perfect for detailed painting, while larger, stiffer brushes work well for applying base coats or textures. For mould making, which we’ll delve into later, lots of cheap chip brushes are absolutely essential. They allow for even application of moulding materials without breaking the bank, and they’re often considered disposable after a project.
Choosing Your Mask-Making Materials
The choice of materials dictates the look, feel, and complexity of your homemade Halloween masks. We work with a variety of mask making materials in our workshop, each offering unique properties suitable for different mask types. For those just starting, paper mache is often the easiest route to begin with, offering a lightweight and versatile foundation.
As you gain confidence, you can move into using air dry clay sculpts. This material allows for much finer detail and creates a solid base for more elaborate designs. For those aiming for professional-grade, realistic homemade Halloween masks, our journey typically leads to making plaster moulds for latex masks. Latex offers incredible flexibility and durability, closely mimicking the look and feel of human skin or monstrous flesh.
We also utilise materials like plaster for mould making, ensuring the intricate details of our original sculpts are perfectly captured. For painting, we opt for high-quality acrylic paints, which adhere well to various surfaces and allow for vibrant, long-lasting colours. Other essential consumables include petroleum jelly as a release agent for moulds, and various adhesives depending on the materials being joined. Understanding these different materials, their properties, and how they interact is key to elevating your mask tutorials from simple crafts to truly impressive works of art.
Beginner-Friendly: Crafting Easy Homemade Halloween Masks with Paper Mache
For anyone looking to dive into the world of mask making, crafting homemade Halloween masks using paper mache is undoubtedly the easiest and most accessible starting point. It’s a technique that requires minimal investment in tools and materials, yet offers a surprising degree of creative freedom. We’ve seen countless fantastic creations begin with this simple, versatile method, perfect for achieving various Halloween mask ideas homemade.
Step-by-Step Paper Mache Mask Tutorial
To begin your paper mache mask, you’ll need newspaper, white glue (PVA glue works perfectly), water, and a base form. A balloon, a plastic bowl, or even your own face (covered in cling film for protection) can serve as your initial mold. The first step involves tearing your newspaper into strips: avoid cutting, as torn edges blend more seamlessly.
Next, prepare your paper mache paste. We typically mix two parts white glue with one part water until it reaches a smooth, spreadable consistency. Dip each newspaper strip into the paste, ensuring it’s fully saturated but not dripping. Drape the strips over your chosen form, overlapping them slightly, and smooth out any air bubbles as you go. We recommend applying at least 3-4 layers for a sturdy mask, allowing each layer to dry partially before adding the next. This ensures a strong, resilient mask, ideal for durable homemade Halloween masks.
Once you’ve achieved your desired thickness, allow the mask to dry completely, which can take 24-48 hours depending on humidity and thickness. This thorough drying is crucial to prevent mold and ensure the mask retains its shape. After drying, carefully remove your mask from its form. You can then trim the edges, cut out eyeholes, and refine the shape with a craft knife or strong scissors, setting the stage for further customisation.
Customising Your Paper Mache Creation
With the basic paper mache shell complete, the real fun of customisation begins. This is where your DIY Halloween mask ideas truly come to life. Start by applying a layer of gesso or white acrylic paint as a primer; this creates an even surface for your paint and helps colours pop. From there, you can paint your mask with acrylics, adding details, textures, and shading to match your vision. We often use sponges or crumpled paper to create interesting textures before painting, giving the mask more depth.
Don’t hesitate to add embellishments like faux fur, fabric scraps, feathers, or even small plastic elements for extra flair. Hot glue is your best friend for securely attaching these additions. For example, a simple paper mache base can become a terrifying monster with jagged teeth made from craft foam, or a whimsical creature with colourful feathers and glitter. This adaptability makes paper mache an excellent choice for crafting unique and cheap homemade Halloween masks without sacrificing creativity.
The beauty of paper mache is its forgiveness; mistakes can often be covered or sanded away, making it an ideal medium for beginners. Once you’re comfortable with paper mache, you’ll find yourself ready to explore more advanced techniques, moving towards intricate designs and ultimately, more realistic homemade Halloween masks.
Stepping Up Your Game: Air Dry Clay for Intricate DIY Halloween Masks
Once you’ve mastered the basics with paper mache, stepping into the realm of air dry clay opens up a whole new world for creating more intricate and detailed homemade Halloween masks. Air dry clay allows for finer sculpting, enabling you to capture subtle expressions, realistic textures, and complex forms that are challenging to achieve with paper alone. This material offers a fantastic bridge between simple craft projects and the professional-level mould making we do in our workshop.
Sculpting Your Masterpiece with Air Dry Clay
When working with air dry clay, we always recommend starting with an armature. This internal support structure, often made from wire, aluminum foil, or even a basic form like a plastic skull, provides stability and helps to define the overall shape of your mask. Building upon an armature prevents your sculpt from collapsing under its own weight and allows for greater structural integrity, especially for larger or more elaborate designs. We typically begin by roughly forming the main features (the brow, nose, cheekbones, and jawline) before adding smaller, more delicate details.
As you sculpt, good sculpting tools are essential. We use a variety of loop tools, spatulas, and pointed instruments to carve, smooth, and add texture. These tools allow us to refine the details of eyes, wrinkles, scars, and other features that bring a character to life. A crucial piece of advice we’ve learned through years of experience is that if you’re planning to use your clay sculpt as a master for a plaster mould, remember the plaster mould picks up almost EVERY detail, including fingerprints. So, take extra care when sculpting to ensure every surface is as smooth or textured as you intend, preventing unwanted blemishes from appearing on your final mask.
We work meticulously, constantly refining the contours and ensuring symmetry (unless an asymmetrical design is intended, of course!). This attention to detail during the sculpting phase is paramount, as it directly impacts the quality and realism of your final realistic zombie mask or other monstrous creation. Regularly stepping back to view your sculpt from different angles helps to identify areas that need further refinement or adjustment.
Drying and Preparing Your Clay Sculpt
Once your air dry clay sculpt is complete, the next critical step is proper drying. Air dry clay needs to dry slowly and evenly to prevent cracking. We often cover our finished sculpts loosely with plastic wrap or a damp cloth for the first 24 hours, allowing the moisture to evaporate gradually. After this initial period, the plastic can be removed, and the mask should be left in a well-ventilated area, away from direct heat or sunlight, for several days or even weeks, depending on its thickness and the specific clay used.
Once completely dry, your clay sculpt will be hard and rigid. At this stage, you can use fine-grit sandpaper to smooth out any remaining imperfections or sharp edges. If you’re creating a mask that will be worn, ensure the inside surfaces are also comfortable and free of rough spots. For more advanced homemade Halloween masks, especially those destined for moulding, the clay sculpt might also need to be sealed with a suitable sealant to protect it and prepare its surface for the mould-making process. This attention to detail in drying and preparation ensures that your base sculpt is perfect before moving on to more complex techniques.
Advanced Techniques: Mould Making for Realistic Latex Masks
For those aspiring to create truly professional-grade homemade Halloween masks, moving beyond direct sculpting into the realm of mould making for latex masks is the ultimate step. This is where the techniques we employ in the Devil’s Dreamworld workshop truly shine, allowing for the replication of intricate designs and the production of durable, flexible masks. As we’ve found, once you’re comfortable with air dry clay sculpts, the natural progression for more sophisticated masks is into making plaster moulds for latex masks, which opens up a world of realistic possibilities.
Designing Your Sculpt for Moulding
Before even beginning the mould-making process, the initial clay sculpt needs to be meticulously designed with moulding in mind. This involves careful consideration of undercuts: areas where the sculpt protrudes, potentially trapping the mould material. For a two-part plaster mould, which is typical for head-sized masks, we meticulously plan where the seam lines will run. These lines dictate how the mould will separate, and careful placement ensures an easier demoulding process and less cleanup on the final latex piece.
We ensure that the clay sculpt is perfectly smooth and refined, addressing any fingerprints or minor imperfections, as the plaster mould will faithfully capture every single detail. Ensuring the sculpt has a slight taper or angle in certain areas can also facilitate the mould’s separation. This initial design phase is critical for minimising complications later in the process and ensuring the creation of high-quality, handmade horror mask replicas.
Creating a Plaster Mould: The Foundation of a Professional Mask
Creating a plaster mould is an intensive but incredibly rewarding process. For a typical mask, we often create a two-part mould. First, the clay sculpt is embedded halfway into a base of clay or plasticine, creating a clear dividing line. Then, we apply plaster over the exposed half of the sculpt, ensuring full coverage and capturing all the details. This is where having lots of cheap chip brushes for mould making becomes invaluable; they allow for precise application, pushing the plaster into every crevice without undue expense.
Once the first half of the plaster mould has set, the dividing clay is removed. We then apply a release agent, typically petroleum jelly, to the exposed plaster surface and the remaining half of the clay sculpt. This prevents the two halves of the plaster mould from bonding together. We then mix and apply the plaster for the second half of the mould. When both halves are cured, they are carefully separated, revealing a perfect negative impression of the original sculpt. The clay sculpt is then removed from within the mould. This entire process is crucial for creating accurate and reusable templates for your mask makers journey.
Our experience has taught us that reinforcing the plaster mould with burlap strips or similar materials embedded within the plaster layers provides extra strength and durability. This prevents the mould from cracking during repeated use, allowing for many identical homemade Halloween masks to be produced. For an in-depth exploration of this essential step, our mould making guide for mask makers provides a detailed walkthrough, ensuring your foundation is as solid as possible.
Pouring and Curing Your Latex Mask
With a robust plaster mould ready, the exciting step of pouring the latex begins. We typically use liquid latex, available from specialty craft or FX supply stores. The process involves layering the latex inside the plaster mould. We start by painting a thin layer into all the intricate details of the mould, ensuring full coverage, and then allowing it to dry to a tacky state. Subsequent layers are built up, gradually increasing the thickness of the mask. The number of layers depends on the desired flexibility and durability of the final mask; typically, 5-7 layers are sufficient for a sturdy, wearable mask.
Each layer needs to cure properly, which involves allowing the water content in the liquid latex to evaporate. This can be accelerated with gentle heat, like a fan or a warm, dry environment, but patience is key to prevent air bubbles and ensure even drying. Once all layers are applied and the latex is fully cured, the mask is carefully demoulded. This involves gently pulling the flexible latex away from the rigid plaster, a delicate process that requires care to avoid tearing the freshly formed mask.
The result is a highly detailed, flexible, and wearable mask that perfectly replicates your original sculpt. Latex masks are incredibly comfortable and durable, making them ideal for long-term use and high-quality mask making materials latex projects. They can be painted and accessorised to achieve stunning, realistic effects, elevating your homemade Halloween masks for adults to an entirely new level of artistry.
Bringing Your Homemade Halloween Masks to Life: Finishing and Painting
Once your mask has been formed, whether through paper mache, clay, or the advanced latex moulding process, the real magic of bringing it to life begins with finishing and painting. This stage is crucial for transforming a blank canvas into a compelling character, giving your homemade Halloween masks their unique personality and realistic appeal. We consider this an art form in itself, where careful technique and attention to detail truly make the difference.
Prepping Your Mask for Paint
Proper preparation is key to achieving a professional paint job that lasts. For paper mache masks, ensure they are completely dry and any rough edges are sanded smooth. We typically apply a primer, such as gesso or white acrylic paint, which creates an even, non-porous surface that helps subsequent paint layers adhere better and appear more vibrant. For clay masks, once dry and sealed, they are usually ready for paint directly, though a light sanding can improve paint adhesion.
Latex masks require a specific approach to preparation. They are often dusted with cornstarch after demoulding to prevent sticking, which needs to be carefully washed off. After washing, ensuring the mask is completely dry is paramount. We then use a tack cloth to remove any residual dust or lint. Many professional mask makers, including ourselves, prefer to paint latex masks with a specific rubber cement-based paint or flexible acrylic paints mixed with a flex additive, as regular acrylics can crack and peel off the flexible surface. This specialised paint ensures durability and flexibility, maintaining the integrity of your homemade Halloween masks.
Mastering the Art of Mask Painting
Painting a mask is much like painting a miniature sculpture; it requires layering, shading, and an understanding of light. We typically start with a base coat that establishes the primary colour of the mask. For instance, a monster mask might begin with a base of pale green, grey, or bruised purple. Once the base is dry, we move on to layering, building up colours and textures to create depth.
Washes are an invaluable technique for highlighting details and adding grime or age. A thin, diluted paint wash applied over the base coat settles into crevices, enhancing wrinkles and textures. Conversely, dry-brushing involves applying a very small amount of paint to a dry brush and lightly dragging it across raised surfaces. This technique effectively picks out highlights and fine textures, such as the ridges of skin or fur. Our approach is to build up realism gradually, avoiding flat colours and embracing the subtle variations found in nature. This careful application ensures your homemade Halloween masks for adults have a truly professional finish.
Adding Details and Weathering Effects
The final details are what truly elevate homemade realistic Halloween masks from good to exceptional. This includes adding elements like realistic eyes, which can be achieved using acrylic doll eyes or carefully painted details. For monster masks, we often sculpt or attach teeth made from resin or rigid foam, painting them with realistic bone tones and adding a touch of gloss for a wet look. Faux fur can be glued around the hairline or along the jaw to create monstrous manes or beards, seamlessly blending with the painted surface.
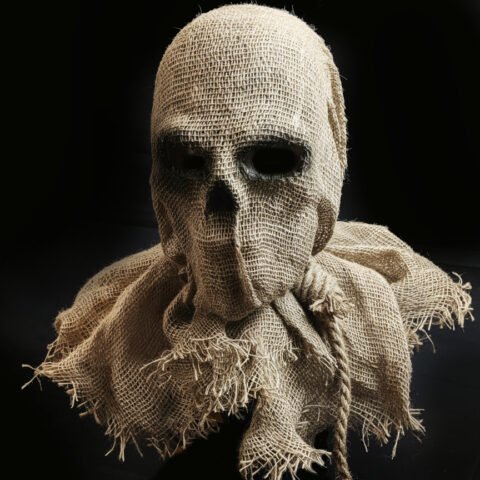
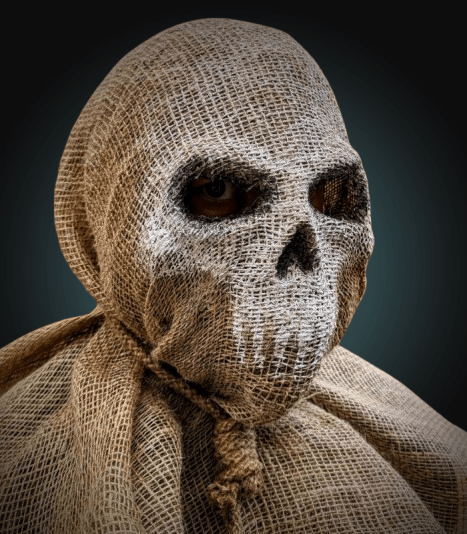
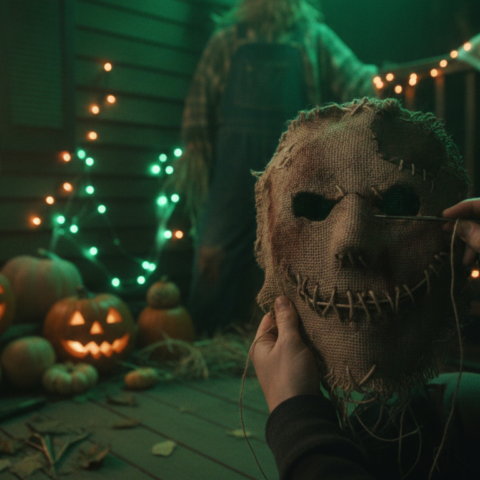
Weathering effects are crucial for creating a sense of history and realism. This might involve carefully splattering fake blood for a gory look, or applying dust and grime using pigments and airbrushing techniques to make a mask appear old and worn. For example, to create a truly terrifying handmade scarecrow mask, we would incorporate ragged fabric elements and strategically placed grime to evoke a sense of decay and neglect. These detailed touches are what transform a simple mask into a captivating piece of homemade Halloween masks artistry, bringing the character vividly to life for any costume or display. Our Skull Scarecrow brief project details how we brought a specific vision to life with meticulous attention to such details.
Inspiring Creations: Our Proud Projects and Halloween Mask Ideas Homemade
At Devil’s Dreamworld, we’ve had the privilege of bringing countless creatures and characters to life through our mask-making process. The satisfaction of seeing a concept transform into a tangible, wearable piece of art is truly immense. One project that particularly stands out in our memory was creating 22 masks for a giveaway event for the game Phasmophobia. It was for a five-day event, and watching people online open their gift boxes from Kinetic Games, seeing the pure enjoyment in their faces when they saw the masks I created, was a great feeling. This is the part of the process we rarely get to experience, and it’s incredibly rewarding.
From Concept to Reality: Case Studies in Mask Making
Every mask project begins with an idea, a spark of inspiration that we then painstakingly develop into a full concept. For the Phasmophobia masks, the challenge was to create multiple unique but cohesive designs that captured the eerie essence of the game. This involved detailed sculpting of various ghostly visages, ensuring each had its own distinct personality while fitting within the overall theme. The efficiency in producing 22 high-quality homemade Halloween masks showcased our ability to streamline the mould-making and casting process without compromising on individual detail or artistic integrity.
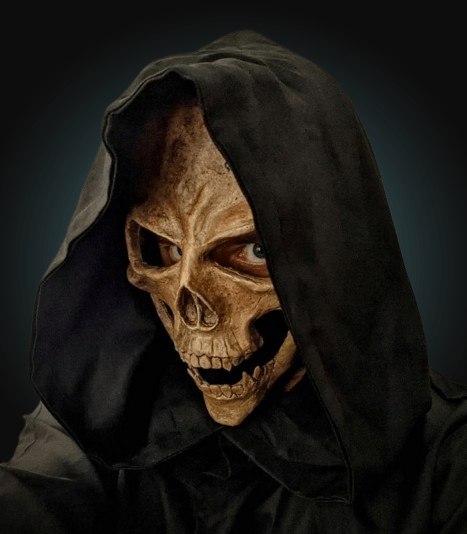
Another memorable endeavor involved crafting a truly realistic zombie mask. This required extensive research into anatomical decay and textural details. We focused on creating exposed bone structures, decaying flesh, and bloodied sinews, all meticulously sculpted and painted. The challenge was making it look both horrific and believable, combining the right balance of texture, colour, and finish to produce a mask that genuinely looked like a creature from beyond the grave. Such projects underscore the dedication involved in crafting high-quality realistic zombie masks at home, requiring both artistic skill and technical precision.
Unleashing Your Imagination: More DIY Halloween Masks Ideas
The world of Halloween mask ideas homemade is vast and exciting. Beyond traditional monsters, consider masks inspired by folklore, steampunk aesthetics, or even abstract art. For those looking for terrifying homemade Halloween masks, think about incorporating exaggerated features like elongated snouts, multiple eyes, or razor-sharp teeth. Using materials like foam latex allows for incredible elasticity, perfect for masks that need to convey dynamic expressions or move with the wearer’s face, making them excellent Halloween costume accessories.
A simple yet effective idea is to create animal masks with a twist: a gothic crow, a cyberpunk fox, or a distressed rabbit. These offer familiar forms with unexpected, unsettling elements. You can also draw inspiration from mythology for creatures like gorgons, minotaurs, or satyrs. The key is to let your imagination roam freely and not be afraid to experiment with different forms, textures, and colour palettes. Remember, every mask tells a story, and yours is waiting to be crafted into an incredible piece of crafting Halloween props.
For more inspiration and a deeper dive into creative approaches, exploring our DIY Halloween mask ideas can provide a wealth of starting points. Whether you’re aiming for something cute, comical, or truly terrifying, the process of bringing your vision to life through homemade Halloween masks is a deeply personal and rewarding endeavour.
Debunking Myths: Anyone Can Make a Homemade Halloween Mask
There’s a common misconception that creating high-quality homemade Halloween masks is an inherently difficult process, reserved only for seasoned artists or those with extensive special effects training. However, in our experience at Devil’s Dreamworld, we’ve repeatedly seen that anyone can make impressive masks at home. It truly comes down to patience, the willingness to learn, and choosing the right techniques for your current skill level.
Embracing the Learning Curve
Just like any craft, mask making has a learning curve. No one starts out creating museum-quality pieces on their first attempt, and that’s perfectly fine. We always encourage beginners to start with simpler methods, like paper mache, to build confidence and understand fundamental principles such as form, texture, and drying times. From there, gradually introducing more complex materials like air dry clay or even exploring the basics of mould making becomes less intimidating. Each project, whether a resounding success or a learning experience, contributes to your growing skill set for making best materials for DIY Halloween masks.
Embracing mistakes as part of the creative process is vital. We’ve certainly had our share of unexpected outcomes in the workshop, from plaster moulds that didn’t quite separate cleanly to paint jobs that needed a complete overhaul. Each challenge presented an opportunity to refine our techniques, learn about material properties, and ultimately, become better mask makers. The journey of crafting homemade Halloween masks is as much about personal growth as it is about the final product, fostering both creativity and problem-solving skills.
There are countless resources available online, including our own tutorials, to guide you through every step. Don’t be afraid to watch videos, read guides, and experiment with different approaches. The most important thing is to just start. You’ll be surprised at what you can achieve once you commit to the process.
The Satisfaction of Your Own Creation
There’s an unparalleled sense of accomplishment that comes from wearing or displaying a mask you’ve crafted yourself. The pride of seeing your vision come to life, knowing every curve and detail was shaped by your hands, is incredibly rewarding. It’s more than just a costume piece; it’s a tangible representation of your creativity and effort. We believe this personal connection makes homemade Halloween masks infinitely more special than any store-bought alternative.
Whether you’re creating a mask for a costume party, a cosplay event, or simply as a piece of art, the process itself is a therapeutic and engaging hobby. It allows you to tap into your imaginative side, develop new practical skills, and express your unique artistic voice. So, cast aside any doubts and take the leap into mask making. We’re confident that with a bit of guidance, patience, and passion, you too can create stunning homemade Halloween masks that will impress and inspire.
“`html
The Transformative Art of Homemade Masks
As we conclude our exploration, the profound magic of crafting homemade Halloween masks becomes undeniably clear. Here at Devil’s Dreamworld, we champion this journey of personal creation, witnessing how concepts evolve into tangible characters. We’ve guided you through a clear progression, from accessible paper mache masks, ideal for foundational skills, to the intricate art of latex mask making using plaster moulds. This journey, moving through air dry clay sculpts, proves that DIY Halloween mask ideas are within anyone’s reach. Dispelling the common myth, our experience confirms: anyone can make incredible masks at home with the right guidance and practice, fostering both artistic expression and practical skill.
The Maker’s Blueprint: Tools, Materials, and Precision
A great mask begins with thoughtful material and tool selection. We’ve emphasized the essential toolkit, from precise blades to various brushes, noting that quality supplies elevate the final product. Our workshop relies on a progression of mask making materials, from paper mache to liquid latex, each serving a unique purpose. Crucially, as detailed in our mould making guide for mask makers, having lots of cheap chip brushes for mould making is invaluable for precise plaster application. Precision extends to every stage: when sculpting with clay, we’ve learned firsthand that plaster moulds pick up almost EVERY detail, including fingerprints, demanding meticulous refinement. This attention to detail carries through to multi-layered latex pouring and the intricate art of painting and weathering, where techniques like washes and dry-brushing transform a simple form into a captivating character with realistic depth.
Lessons from the Workshop: Inspiration and Your Creative Path
Our journey at Devil’s Dreamworld has provided countless rewarding moments, inspiring us to share our insights. A standout project involved crafting 22 unique masks for a Phasmophobia game giveaway event. Witnessing the pure joy on recipients’ faces was an unparalleled experience, underscoring the impact of handmade art. Projects like our realistic zombie mask, meticulously designed for anatomical decay, exemplify the depth of dedication possible. We encourage you to draw inspiration from diverse sources – be it the menacing charm of a handmade scarecrow mask (as explored in our Skull Scarecrow brief) or your own unique visions. Embrace the learning curve; every challenge refines your techniques and deepens your understanding. Ample tutorials and resources await, so let your imagination lead the way in crafting your unique homemade Halloween masks.
Your Legacy Unmasked: The Power of Personal Creation
The unparalleled sense of accomplishment from creating and wearing a mask you’ve crafted yourself is deeply satisfying. The pride of seeing your artistic vision materialize, shaped by your own hands, offers a unique reward no store-bought item can replicate. These are more than Halloween costume accessories; they are tangible testaments to your creativity and resilience. As you explore the vast possibilities of homemade realistic Halloween masks, remember that the true magic lies in the process itself – the joy of creation and the unique voice you infuse into every piece. We invite you to delve deeper into custom creations with Devil’s Dreamworld products and resources. Which terrifying, whimsical, or wonderfully weird character will you unleash next, leaving your indelible mark on the canvas of Halloween?
“`
Further Reading
For more background and inspiration, explore related resources on Wikipedia.

Comments 0
Log in to leave a comment.