
DIY Scarecrow Mask: 7 Spooky Steps for Halloween
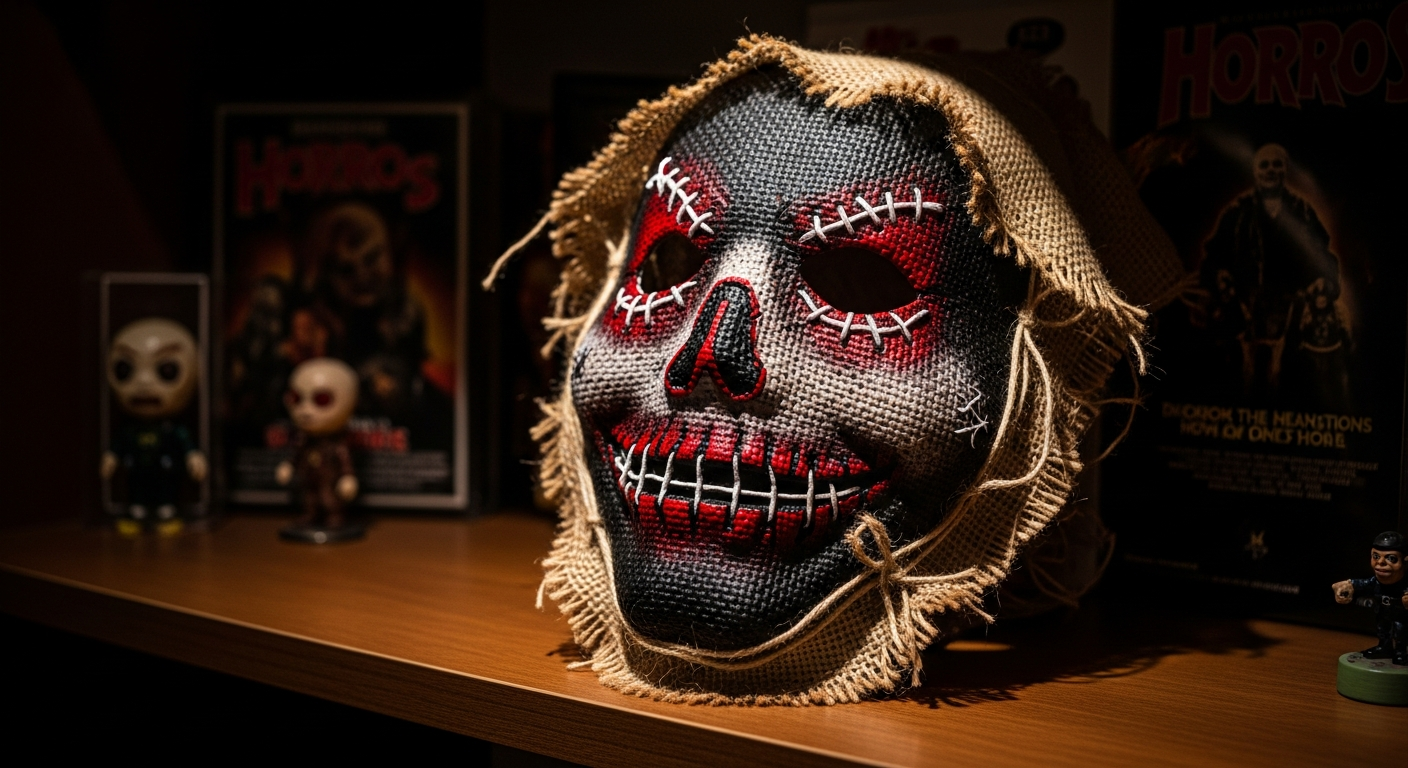
DIY Scarecrow Mask: Craft Your Own Terrifying Halloween Icon
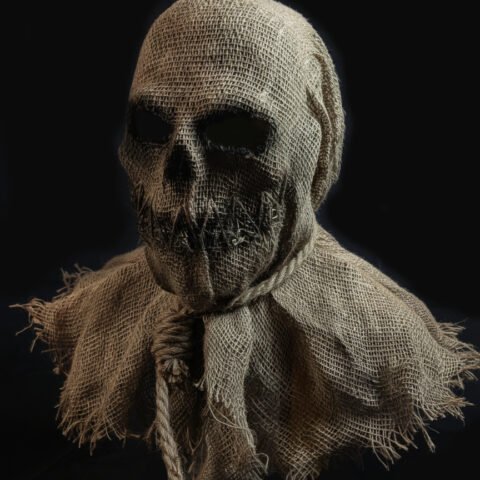
When autumn leaves fall and the air turns crisp, the spirit of Halloween awakens, calling for costumes that truly stand out. Forget mass-produced plastic; nothing embodies rustic horror and personal creativity quite like a homemade diy scarecrow mask. At Devil’s Dreamworld, we’ve found that crafting your own allows for unparalleled customization and a genuinely unsettling presence. You don’t need to be an expert to create a good-looking scarecrow mask; often, just a scrap piece of good quality, tight-knit burlap over a face shell or head form can achieve great results.
A great scarecrow mask isn’t just worn; it’s a statement, a unique nightmare brought to life by your own hands. We often use a sculpted 3D printed face shell in our workshop, gluing that quality burlap over top to maintain its shape and give it that authentic, weathered look. The process is simpler than you might think, opening up a world of terrifying possibilities for your next Halloween ensemble. We’ll show you how to gather the right materials, forge a sturdy foundation, weave in wicked textures like straw and stitching, and even summon that perfectly spooky sheen without overworking your paint – airbrushing highlights, we’ve learned, is often the best way to achieve a haunting finish.
Ready to bring your spooky vision to life? Let’s dive into the step-by-step guide to unleash your inner costume conjurer and create a scarecrow mask that will haunt dreams long after the candy is gone.
As autumn leaves fall and the air turns crisp, the spirit of Halloween awakens. For those seeking a truly chilling and unique costume, a DIY scarecrow mask offers the perfect blend of rustic horror and personal creativity. Forget mass-produced plastic; crafting your own allows for unparalleled customization and a genuinely unsettling presence. Dive into the world of spooky DIY with these essential insights on how to create a terrifying scarecrow mask that will haunt dreams long after the candy is gone.
- Gather Your Ghastly Gear: Learn to compile the perfect arsenal of materials, from durable fabrics to eerie embellishments, ensuring your scarecrow mask is built for maximum fright.
- Forge the Frightful Foundation: Discover simple yet effective techniques for constructing a sturdy and comfortable mask base, laying the groundwork for your masterpiece of terror.
- Weave in Wicked Textures: Master the art of incorporating classic scarecrow elements like ragged burlap, rustic straw, and unsettling stitched details to bring your mask to life with authentic dread.
- Summon a Spooky Sheen: Explore distressing methods and specialized painting tips to achieve that perfectly weathered, ancient, and undeniably creepy aesthetic that defines a true horror scarecrow.
- Secure Your Sinister Silhouette: Understand how to ensure your homemade scarecrow mask fits snugly and comfortably, allowing you to haunt all night without a hitch.
- Unleash Unique Nightmares: Get inspired with customization ideas and variations that transform your DIY scarecrow mask into a one-of-a-kind horror statement, from menacing grins to hollow eyes.
Crafting a DIY scarecrow mask is more than just a Halloween project; it’s an opportunity to infuse your costume with a personal touch of terror. By focusing on these core elements, you’re well on your way to creating a scarecrow that isn’t just seen, but felt. Ready to bring your spooky vision to life? Let’s dive into the step-by-step guide to unleash your inner costume conjurer.
Planning Your Haunting Vision: Conception for Your DIY Scarecrow Mask
Defining Your Scarecrow’s Persona: From Rustic to Rage-Filled
Embarking on the journey to create your own truly terrifying homemade Halloween masks begins with a clear vision. When we approach a new project in our workshop, the first step is always to define the character behind the mask, especially for a complex piece like a Devils Dreamworld-inspired horror mask. We explore different styles for your diy scarecrow mask, ranging from a classic, unsettling farmhand with a silent, watchful gaze to a grotesque, rage-filled horror icon.
This initial conceptualization is crucial for setting the tone. Consider whether your scarecrow is ancient and weather-beaten, or freshly assembled with a sinister, almost manufactured malice. Brainstorming unique features and expressions for your diy scarecrow mask allows it to stand out from the crowd and embody a distinct personality. Will it have a wide, stitched grin or hollow, empty eyes?
Drawing Dreadful Designs: Sketching Your Spooky Mask Ideas
Once the persona is established, we move to the drawing board. Sketching out your mask concept is an essential technique to guide the entire creation process for your diy scarecrow mask. It helps translate abstract ideas into tangible shapes and forms, ensuring that every detail, from the menacing grin to the texture of the burlap, is considered before cutting any materials.
As we sketch, we always consider face proportions and how the mask will integrate with your full Halloween costume accessory. Think about how the mask will sit on your face, where the eye holes will be placed for optimal vision, and how it will blend seamlessly with a hood or collar. A well-proportioned sketch ensures comfort and maximum impact for your spooky mask ideas.
Step 1: Gather Your Ghastly Gear – Materials for Your DIY Scarecrow Mask
Essential Tools and Mask-Making Materials
As experienced makers, we know that the success of any project, especially a diy scarecrow mask, hinges on the quality of your materials and tools. We always start with a comprehensive list to ensure nothing is overlooked. For a high-quality scarecrow mask, good quality burlap is absolutely essential, as we’ve found you can distress and weather it beautifully afterwards.
Beyond the primary fabric, we recommend gathering various adhesives like hot glue, fabric glue, and perhaps even contact cement for different bonding needs. For embellishments, consider sturdy thread, twine, and a selection of paints. We prioritize recommendations for durable and lightweight options for the mask base, suitable for a comfortable yet scary halloween scarecrow mask that can be worn for extended periods without discomfort.
Choosing Your Creepy Fabrics: Burlap, Canvas, and Beyond
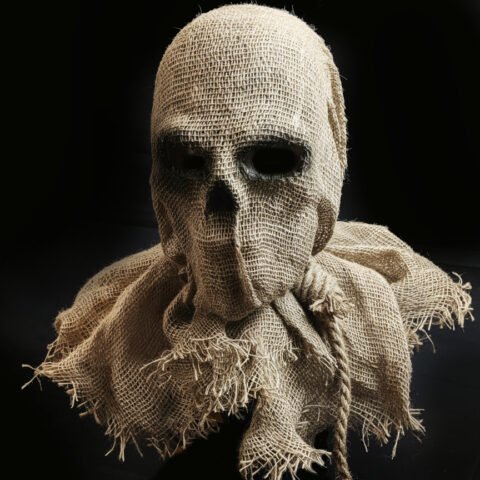
Burlap is undoubtedly the quintessential choice for a grinning scarecrow mask, lending an instant rustic, aged, and slightly unsettling texture. When selecting your burlap, getting a good quality, nice tight knit one makes for an exceptionally good scarecrow mask. This tight weave provides a better surface for painting and distressing, ensuring your diy scarecrow mask holds its form and details effectively.
However, don’t limit your creative choices. We’ve experimented with alternative fabric choices such as canvas, aged muslin, or even distressed denim for different textures and effects on a homemade scarecrow mask. Combining fabrics can add layers of visual interest and depth, enhancing the mask’s overall scary appeal. Think about how these fabrics will drape and fray to create the desired spooky aesthetic.
Straw and Stitching: Authentic Elements for Your Horror Mask
No scarecrow mask is complete without authentic straw elements and robust stitching. For a realistic and creepy straw mask effect, we recommend using natural dried straw or raffia, ensuring it’s clean and free from allergens if possible. These materials provide that iconic, unkempt texture that defines a scarecrow’s appearance, making your diy creepy scarecrow mask for Halloween truly stand out.
For the unsettling stitches and patched-up details, sturdy thread and yarn options are key. Waxed linen thread or thick embroidery floss in dark, earthy tones work wonderfully to create visible, coarse stitches that suggest rough repairs and forgotten origins. These deliberate stitching choices contribute significantly to the mask’s horror aesthetic, making it look genuinely patched together and menacing.
Step 2: Forge the Frightful Foundation – Building Your Scarecrow Mask Base
Creating a Sturdy Structure: The Core of Your Homemade Halloween Mask
The foundation is where your diy scarecrow mask truly begins to take shape, providing the structure upon which all other elements will be built. At Devils Dreamworld, we often use a sculpted 3D printed face shell and glue the burlap over top to maintain its shape, which provides an incredibly sturdy and consistent base. However, there are many other excellent ways to achieve a form-fitting base for your diy scarecrow mask.
For DIY enthusiasts, using a readily available plastic face shell, forming a base from sturdy cardboard, or even employing paper mache over a mannequin head are all viable methods. The key is creating a stable yet lightweight core that will support the burlap and other embellishments. We’ve also learned that just a scrap piece of burlap over a face shell or head form can achieve great results, proving you don’t need to be an expert to create a good looking scarecrow mask.
Ensuring comfort and breathability in the base structure of your handmade scarecrow mask is paramount. We always consider adding subtle ventilation holes or channels in the initial base. This foresight prevents the mask from becoming uncomfortable or claustrophobic during prolonged wear, which is especially important for a scary halloween scarecrow mask designed for events or trick-or-treating.
Shaping the Sinister Silhouette: Defining Facial Features
Once your base is solid, it’s time to define the sinister silhouette and facial features that will give your diy scarecrow mask its terrifying character. Techniques for sculpting or shaping prominent features like eye sockets, a skeletal nose, and a gaping mouth onto your mask base are crucial for creating expression. We often use clay, foam, or even crumpled paper secured with tape to build up these areas, giving the mask definition beneath the burlap.
When forming these initial elements for your scarecrow mask tutorial, careful consideration for vision and ventilation is vital. The eye holes should be wide enough for clear sightlines but can be covered with mesh or darkened fabric to maintain the illusion of depth. Ensuring adequate airflow around the nose and mouth areas will enhance comfort and prevent fogging, ensuring your scary scarecrow mask is both effective and practical.
Step 3: Weave in Wicked Textures – Bringing Your Burlap Mask to Life
Applying Burlap and Fabric: The Skin of Your Skull Scarecrow Mask
With the foundation laid, the real fun begins as we apply the ‘skin’ to your diy scarecrow mask, transforming it into a textured masterpiece. The step-by-step guide on how you make a burlap scarecrow mask involves carefully attaching fabric to the mask base, ensuring it conforms to the sculpted features. We typically use strong fabric adhesive or a hot glue gun to secure the burlap, working in sections to manage the material and prevent bunching.
To truly capture that ancient, weathered look for your Skull Scarecrow Mask, we focus on tips for creating natural folds, wrinkles, and distressed areas. Don’t be afraid to pull, crinkle, and even slightly tear the burlap in strategic spots before gluing it down. This adds incredible character and tells a story of decay and abandonment, making your homemade scarecrow mask appear genuinely old and terrifying.
Stitching Scars and Seams: Crafting the Patched-Up Look
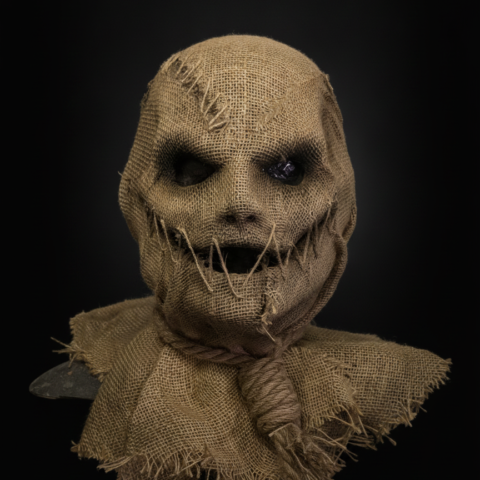
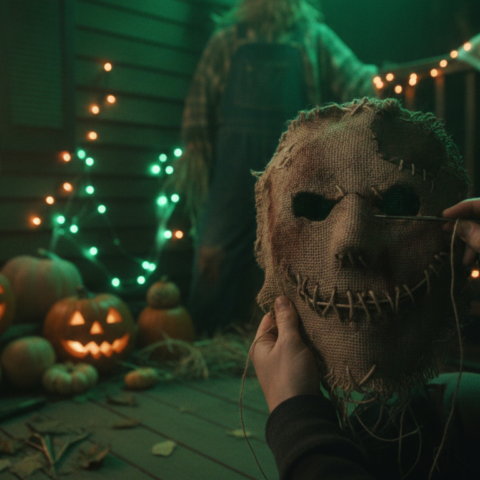
The patched-up look is fundamental to a classic scarecrow, and we embrace this by crafting deliberate stitching scars and seams. Techniques for hand-stitching fabric pieces together can create incredibly realistic patchwork and grotesque scars that enhance the horror aesthetic. We use large, uneven stitches with thick twine or yarn, making sure they are visibly coarse and irregular, as if roughly sewn by clumsy, sinister hands.
Using different types of thread and stitching styles can further enhance the creepy appeal of your homemade scarecrow mask. Consider thick, dark embroidery floss for primary seams and thinner, lighter thread for delicate, frayed edges. These details are vital for creating a truly menacing character, suggesting a mask that has been repaired countless times after untold horrors, giving your scary halloween scarecrow mask its unique, unsettling history.
Adding Authentic Straw Elements: How Can I Attach Straw to a Mask?
Integrating straw is key to completing the scarecrow illusion, transforming a simple burlap form into a truly rustic and terrifying figure. When we consider how can I attach straw to a mask, we focus on effective methods for securely attaching straw around the edges, neck, and other areas to create a natural straw mask effect. Hot glue is an excellent choice for this, applied in small sections to build up layers of straw.
We’ve found that pre-bunching small bundles of straw makes attachment easier and more controlled for your diy scarecrow mask. For the best scary scarecrow mask vibe, we recommend tips for making straw look realistically messy and integrated with the fabric. Don’t arrange the straw too neatly; allow some strands to stick out wildly, as if it has been through rough weather and tumultuous events. This unkempt appearance significantly contributes to the authentic horror mask feel, ensuring your homemade scarecrow mask is genuinely chilling.
Step 4: Summon a Spooky Sheen – Distressing and Painting Your Scarecrow Mask
The Art of Age and Decay: How Do I Make a Scarecrow Mask Look Scary or Creepy?
To truly imbue your diy scarecrow mask with a sense of dread and history, mastering the art of age and decay is essential. One of the most effective techniques for distressing the fabric to create a worn, grimy, and aged appearance involves physical manipulation. We use sandpaper, wire brushes, and even cheese graters to gently abrade the burlap, creating frayed edges and thinning areas that mimic natural wear and tear.
Beyond physical distressing, incorporating natural elements like mud or tea stains can add an authentic layer of grime, giving your halloween scarecrow mask a deeply unsettling character. Remember, the goal is not just to make it old, but to make it look like it has endured countless seasons of exposure and neglect. These methods help to break down new materials, transforming them into something ancient and terrifying, making your scary scarecrow mask authentically creepy.
For more advanced distressing techniques, especially regarding fabric aging in prop making, external resources can offer additional insights. Exploring resources from theatrical prop design could provide further inspiration for creating that perfect aged look. A great example of detailed distressing techniques can be found at specialized prop-making sites such as Tested.com, offering insights into transforming new materials into weathered relics.
Painting for Pure Terror: What Kind of Paint Should I Use for a Fabric Scarecrow Mask?
Painting is where your halloween scarecrow mask truly comes to life, allowing you to add depth, shadows, and subtle ghastly details. When it comes to what kind of paint should I use for a fabric scarecrow mask, we primarily recommend acrylics or fabric paints. These paints adhere well to burlap and other fabrics, offering good coverage and a range of colors suitable for a sinister palette.
One crucial lesson we’ve learned in our workshop is that overworking the paint on the burlap can often do more harm than good, creating a flat, unnatural look. Airbrushing highlights is definitely the best way to achieve subtle shading and highlights, allowing for smooth transitions and a more realistic, terrifying appearance for your diy scarecrow mask. It helps to build up layers gradually, adding depth without obscuring the natural texture of the fabric.
Beyond airbrushing, hand-painting details such as dark circles around the eyes, stained teeth, or subtle veins can enhance the depth and creepiness significantly. These focused touches make your mask truly haunting, transforming your `homemade scarecrow mask` into a truly unique and terrifying creation. Remember, a lighter touch with paint often yields more sinister results.
Weathered Wonders: Applying Grime and Gore Effects
To push your diy scarecrow mask from merely creepy to utterly terrifying, applying grime and gore effects is the final, impactful step. We utilize various tips for adding realistic dirt, grime, and even subtle bloodstains (if desired) to achieve a truly menacing horror mask effect. Washes made from thinned-down dark brown or black paint are excellent for settling into the fabric’s crevices, creating shadows and the illusion of accumulated filth.
Dry brushing with lighter earth tones or even a touch of white can bring out the burlap’s texture, giving it an aged, sun-bleached appearance. For those aiming for a more visceral effect, judiciously applied faux blood can suggest a grim past, but always remember that less is often more when it comes to gore. A little can go a long way in telling a terrifying story for your scarecrow mask tutorial, implying untold horrors without being overly explicit.
By using these techniques, you can create depth and shadow for an aged, long-forgotten look, making your diy scarecrow mask seem as though it has been standing silent guard in a field for decades, absorbing the darkness of countless nights. Exploring techniques used in movie monster making for realistic blood effects can also elevate your craft. Websites like Stan Winston School of Character Arts offer fantastic resources for prop and effect artists looking to achieve maximum impact with their creations, providing valuable insights into creating lifelike horror elements.
Step 5: Secure Your Sinister Silhouette – Ensuring Fit and Comfort
Padding for the Perfect Fit: Wearing Your grinning scarecrow mask
Once your terrifying creation is visually complete, ensuring its wearability is the next critical step. We focus on strategies for adding padding to the interior of your diy scarecrow mask for a snug and comfortable fit. Soft foam, upholstery batting, or even strategically placed pieces of old T-shirts can be glued inside to fill gaps and cushion pressure points. This ensures that your grinning scarecrow mask rests comfortably on your face, preventing wobbling or rubbing.
Beyond comfort, we prioritize ensuring clear vision and adequate ventilation for prolonged wear during Halloween festivities. The eye holes should be unhindered, and we often add small, discrete ventilation holes around the mouth and nose area of the base. This careful attention to comfort and practicality means you can fully immerse yourself in your terrifying persona without distraction, making your halloween scarecrow mask a truly effective costume piece.
Straps and Support: Keeping Your Mask in Place All Night
A phenomenal diy scarecrow mask needs reliable support to stay perfectly in place, even through hours of haunting. We employ best practices for attaching secure straps or elastic bands to keep your homemade scarecrow mask from slipping or shifting. Strong elastic, adjustable webbing, or even leather straps riveted or heavily sewn to the mask’s base provide excellent stability.
We often use a multi-point harness system for heavier masks, with straps extending from the temples and jawline to meet at the back of the head. This distributes the mask’s weight evenly, enhancing comfort and security. Tips for ensuring the mask moves naturally with your head involve adjusting tension and placement, allowing for maximum effect as you turn and gesture, making your scary scarecrow mask feel like a natural extension of your character.
Step 6: Unleash Unique Nightmares – Customization and Advanced DIY Halloween Mask Ideas
From Menacing Grins to Hollow Eyes: Personalizing Your Skull Scarecrow Brief
The true essence of a diy scarecrow mask lies in its potential for personalization, transforming it into a unique nightmare. We encourage creative approaches to customizing the mouth and eye areas of your diy scarecrow mask for different expressions of terror. A wide, stitched smile can convey disturbing cheerfulness, while hollowed-out, shadowy eyes can suggest a soulless entity, perfectly aligning with a Skull Scarecrow Brief.
For an extra layer of chilling effect, consider adding LED lights for glowing eyes that pierce through the darkness. Alternatively, using a dark, transparent mesh behind the eyeholes can create a shadowed, hollow look, making it difficult for onlookers to discern your actual features. These subtle modifications dramatically enhance the fear factor of your scary halloween scarecrow mask, leaving a lasting impression.
Beyond Burlap: Incorporating Other Macabre Elements
While burlap forms the classic canvas, we constantly explore ideas for adding extra details that elevate your diy scarecrow mask to new levels of horror. Think about incorporating faux branches or gnarled twigs strategically around the mask, making it appear as though the scarecrow is literally overgrown with its environment. Twine or rough rope can be woven through the burlap, creating a sense of being bound or crudely assembled.
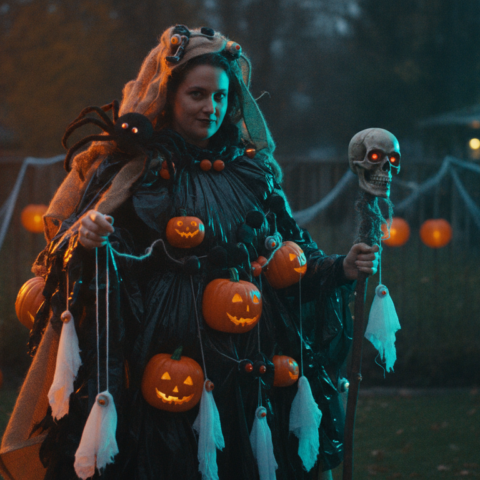
Even small, spooky elements like faux spiders, dried leaves, or even rusty bells can be affixed to your easy step-by-step scarecrow mask tutorial. Exploring how to integrate your mask into a larger costume theme, perhaps as part of a haunted forest creature or a cursed farmer, enhances the overall effect. These macabre additions contribute to a rich, layered narrative for your homemade scarecrow mask.
The Devil’s Dreamworld Touch: Inspiration for Your Next Handmade Horror Mask
At Devils Dreamworld, we believe in pushing the boundaries of horror, and your diy scarecrow mask is an opportunity to do the same. Drawing inspiration from professional horror masks and practical effects, as seen in how a Handmade Horror Mask is made, can provide advanced costume making techniques. We’re constantly experimenting with new materials and methods to achieve truly unsettling results.
We encourage every maker to experiment with different textures, weathering techniques, and character concepts to develop your own signature scary scarecrow mask style. This creative exploration is at the heart of what we do, pushing beyond simple replication to create something uniquely terrifying. Your next diy scarecrow mask could be your most chilling creation yet, embodying the spirit of truly bespoke horror.
Unleashing the Terror: Crafting Your Own Scarecrow Nightmare
Embarking on the journey to forge your own DIY scarecrow mask is far more than a simple crafting project; it’s an immersive dive into the unsettling world of macabre artistry. As makers at Devils Dreamworld, we understand the profound satisfaction that comes from transforming humble materials into a truly terrifying vision. This comprehensive guide has walked you through every critical stage, from the initial spark of an idea to the final, chilling details that breathe malevolent life into your creation. We’ve explored the nuances of conception, the importance of foundational integrity, the intricate dance of texture, and the transformative power of distressing and paint. Now, let’s revisit the core insights that will empower you to craft not just a mask, but a wearable nightmare, ready to haunt any Halloween night.
The Genesis of Fear: Vision, Foundation, and Accessibility
Every truly terrifying homemade Halloween mask begins with a clear, unsettling vision. We emphasized defining your scarecrow’s unique persona (whether it’s an ancient, silent watcher or a grotesque, rage-filled entity) and meticulously sketching these concepts. This initial conceptualization isn’t just about aesthetics; it’s about imbuing your DIY scarecrow mask with a distinct, unsettling character that resonates with dread. But a terrifying vision demands a robust foundation.
At Devils Dreamworld, we often utilize a sculpted 3D printed face shell as a base, providing an incredibly sturdy and consistent structure onto which we then glue the burlap to maintain its shape. However, we’ve found that you don’t need to be an expert to create a good-looking scarecrow mask. The beauty of DIY lies in its adaptability; even a scrap piece of burlap over a simple face shell or head form can achieve great results, proving that accessibility and creativity go hand-in-hand. The key is creating a stable, lightweight, and breathable core that ensures comfort without compromising the sinister silhouette. Prioritizing comfort and ventilation from the outset means your frightening creation can be worn for extended periods, allowing you to fully embody the terror.
The Soul of the Scarecrow: Materials and Methodical Textures
The true essence of a classic scarecrow mask lies in its authentic texture and meticulous construction. We consistently stressed that the success of your project hinges on the quality of your materials, and for a grinning scarecrow mask, good quality burlap is absolutely essential. A nice, tight-knit burlap provides an exceptional surface for subsequent distressing and weathering, allowing for deeper, more realistic character. Beyond the primary fabric, the careful selection of adhesives, sturdy threads, and natural elements like dried straw or raffia forms the backbone of your mask’s authenticity.
Bringing your handmade scarecrow mask to life involves an intricate dance of application and detail. Securing burlap to the base, ensuring natural folds and wrinkles, creates an immediate sense of age and abandonment. The art of visible, coarse stitching, using thick twine or yarn to form patchwork and grotesque scars, is paramount to the scarecrow’s patched-up lore. And, of course, no DIY creepy scarecrow mask for Halloween is complete without its iconic straw elements. We emphasized securely attaching straw, but crucially, making it look realistically messy and integrated with the fabric, ensuring that unkempt appearance that truly defines a horror scarecrow.
The Alchemy of Fear: Distressing, Painting, and Narrative
Transforming new materials into ancient, terrifying relics is where your DIY scarecrow mask truly finds its voice of dread. The art of age and decay involves both physical distressing, using sandpaper or wire brushes to abrade burlap, and the incorporation of natural elements like mud or tea stains to simulate grime and neglect. This process creates a mask that whispers stories of countless seasons and forgotten fields.
When it comes to painting, we reiterated the importance of a nuanced approach. While acrylics and fabric paints are ideal for burlap, one crucial lesson we’ve learned in our workshop is that overworking the paint on the burlap can often do more harm than good, resulting in a flat, unnatural appearance. Instead, airbrushing highlights is definitely the best way to achieve subtle shading and highlights, building depth without obscuring the fabric’s natural texture. Hand-painted details like dark eye circles or stained teeth further enhance the mask’s inherent creepiness. Finally, the judicious application of grime and gore effects (thinned washes, dry brushing, and subtle faux blood) pushes your creation from merely creepy to utterly terrifying, allowing your scary Halloween scarecrow mask to tell a grim, unspoken narrative.
Beyond the Burlap: Fit, Customization, and Lasting Impressions
A phenomenal horror mask is not only visually impactful but also functional and comfortable. We outlined the critical steps for ensuring a perfect fit, from strategically placed padding inside your DIY scarecrow mask to the attachment of secure straps or a multi-point harness system. This attention to detail ensures your Skull Scarecrow Mask stays firmly in place, allowing clear vision and adequate ventilation for prolonged wear, letting you fully immerse yourself in your terrifying persona.
The final step in crafting your ultimate DIY scarecrow mask is personalization. Whether you’re customizing the mouth for a wide, stitched grin or adding LED lights for glowing, hollow eyes, these modifications transform your mask into a unique nightmare. Incorporating additional macabre elements like faux branches, gnarled twigs, or even rusty bells creates a layered, immersive experience, hinting at a larger, more sinister world. At Devils Dreamworld, we believe in pushing the boundaries of horror, constantly experimenting with new materials and methods to achieve truly unsettling results. Your DIY scarecrow mask is an opportunity to explore these advanced DIY Halloween mask ideas, drawing inspiration from professional practical effects and developing your own signature style of terror.
As you stand before your finished creation, gaze into the unsettling depths of your own making. Which terrifying creation will you bring to life next? The journey of mask-making is one of endless discovery and chilling creativity. Embrace the craft, unleash your imagination, and let your DIY scarecrow mask be a testament to the horror you can conjure. For more inspiration and essential mask-making materials, explore the unsettling depths of Devils Dreamworld, where every Handmade Horror Mask tells a story of fear.
Comments 0
Log in to leave a comment.