
How to Make a Burlap Mask: Ultimate Scarecrow & Horror Guide
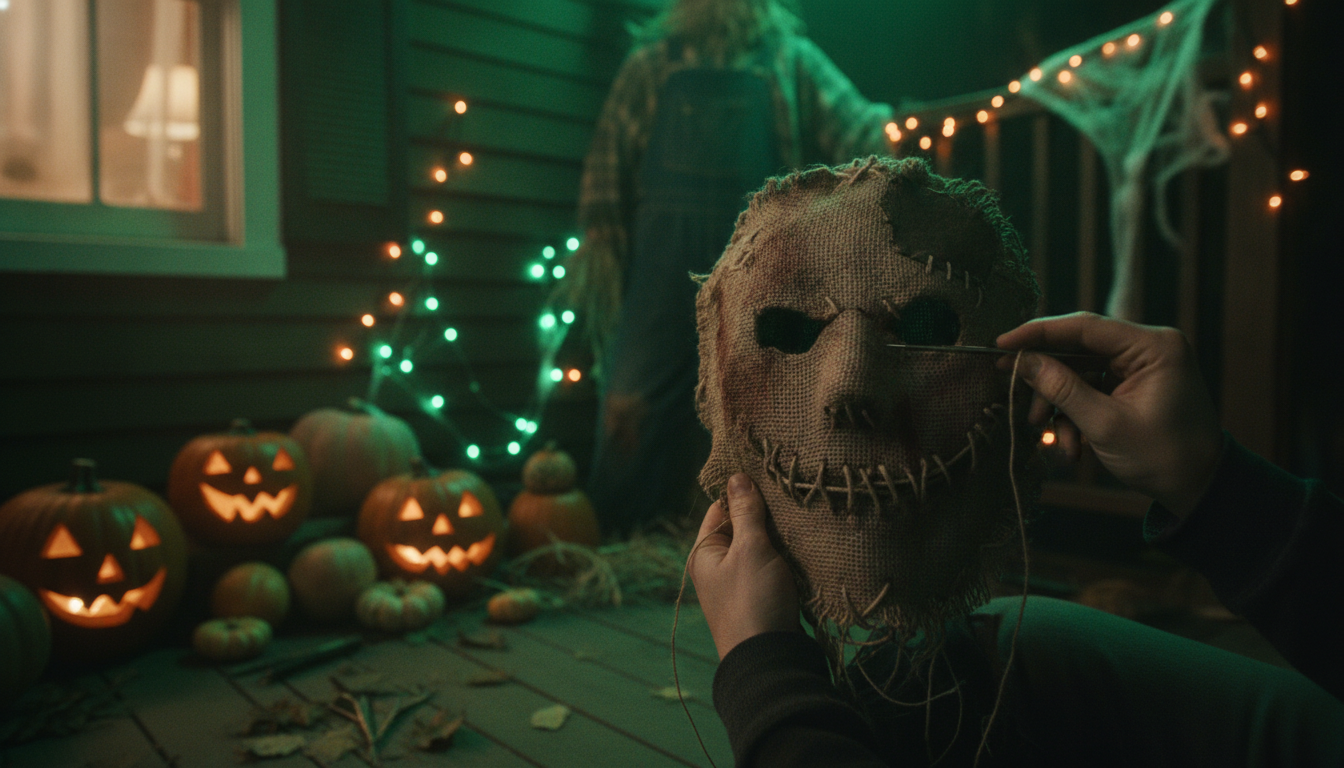
Ever wondered how to transform a simple piece of fabric into a chilling work of art, perfectly capturing the eerie essence of a scarecrow or the unsettling menace of a horror icon? Learning how to make a burlap mask is not just a crafting project; it’s an opportunity to unleash your creativity and bring a truly unique, custom fright to life. Forget mass-produced, flimsy disguises; a handmade burlap mask offers unparalleled texture, character, and an authentic, rustic horror appeal that store-bought versions simply can’t match.
Here in our workshop at Devil’s Dreamworld, we’ve spent years perfecting the art of mask making, and burlap has consistently proven itself as an incredibly versatile material for creating everything from a sinister scarecrow to a full-blown creature feature. We’ve discovered that the key to a truly effective and comfortable DIY burlap mask lies in its foundation. Early on, we quickly learned the importance of using face shells, whether latex or 3D printed, which are essential for both keeping the sometimes-itchy burlap off the skin and ensuring the mask holds its terrifying shape. Furthermore, finding the right kind of glue to firmly adhere the burlap to these face shells was a memorable challenge that shaped our current, more robust processes.
Crafting a compelling burlap mask demands not just vision, but the right tools and techniques. In our experience, starting with a good quality burlap and materials, alongside a reliable, sharp pair of material scissors, makes all the difference in achieving clean cuts and precise shaping. From there, it’s about mastering stiffening techniques, sculpting distinct contours, and adding those crucial details that transition your design from a basic form into a living nightmare. You might be surprised at the versatility, allowing for anything from a classic scarecrow mask to a more intricate, layered horror design.
We’ve tackled some unique challenges along the way, like a customer who requested a black burlap mask over a skull face shell. While it sounded great in concept, the black burlap initially obscured the intricate skull details. We overcame this by employing a careful dry brushing technique in a lighter shade to pull out the highlights, then used an airbrush with black paint to enhance the deeper, shadowy areas of the skull. This kind of problem-solving is what elevates a good mask to an unforgettable one, adding realistic texture, age, and a truly menacing presence.
In this ultimate guide, we’re sharing our most effective methods and insider tips for creating a professional-grade burlap mask, whether your vision is a classic scarecrow or a menacing horror creature. You’ll learn everything from assembling your core masking kit and mastering burlap stiffening to sculpting precise features, infusing terror with realistic distressing, and securing your frightful creation for comfort and durability. Let’s delve into the essential techniques that will empower you to create a truly unforgettable piece of horror art.
Crafting a custom burlap mask is a rewarding project for anyone looking to add a touch of authentic fright to their Halloween costume or prop collection. From the rustic charm of a scarecrow to the chilling menace of a horror icon, burlap offers unparalleled versatility. Below, we’ve distilled the essential techniques and insider tips that will guide you in creating a truly unforgettable mask.
- Assemble Your Core Masking Kit: Secure essential materials like sturdy burlap, suitable adhesive for stiffening, various paints for distressing, and an armature or mold to establish the mask’s initial form and structure.
- Master Burlap Stiffening Techniques: Learn the most effective methods to stiffen burlap, ensuring your mask holds its shape, whether you opt for fabric stiffener, diluted glue, or a starch solution for durability and rigidity.
- Sculpt Your Vision with Precision: Discover step-by-step processes for shaping and forming the burlap, allowing you to create distinct contours and foundational elements that define the mask’s overall character, from a rudimentary scarecrow head to more complex features.
- Infuse Terror with Realistic Detailing: Explore specialized techniques for achieving a truly scary or highly detailed appearance, focusing on distressing, fraying, and sculpting methods that add texture, age, and a menacing presence to your mask.
- Craft Expressive Facial Elements: Get guidance on how to accurately add compelling facial features, including eerie eyes, gaping mouths, and strategic stitching, bringing your scarecrow or horror design to life with maximum impact.
- Secure and Refine Your Frightful Creation: Understand the critical finishing touches, from applying sealants to enhancing durability, and learn how to properly secure the mask for comfortable wear or display, ensuring longevity and stability.
- Adapt Your Design for Scarecrow or Horror Themes: Gain insights into how minor adjustments in detailing, distressing, and coloration can dramatically shift your burlap mask’s theme, seamlessly transitioning it from a classic scarecrow to a terrifying horror character or even a Jason-inspired design.
Whether you’re aiming for a classic scarecrow or a terrifying horror creature, mastering these techniques will empower you to create a professional-grade burlap mask that stands out. The following sections will delve into each step with detailed instructions, helping you bring your eerie vision to life.
Assembling Your Core Masking Kit: Essential Materials for Your Burlap Creation
When we set out to craft a terrifyingly authentic costume, knowing how to make a burlap mask with professional flair is key. The journey begins with gathering the right materials, as the quality of your components directly impacts the final look and durability of your creation. From our workshop experience, we’ve learned that attention to detail in this initial phase saves a lot of trouble down the line.
Choosing the Right Burlap: Texture, Weave, and Durability
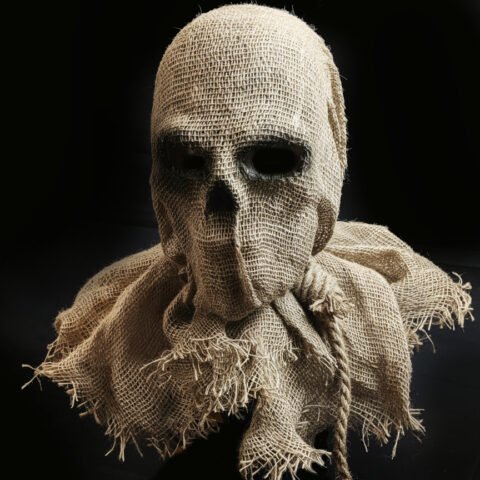
Selecting the perfect burlap is the foundation for any compelling scarecrow or horror mask. We’ve found that understanding the different types of burlap is crucial for optimal mask making. Some weaves are tighter, offering a smoother surface for painting, while others are looser, perfect for a distressed, weathered look.
From our experience, a good quality burlap can make all the difference, providing both structural integrity and aesthetic appeal. When crafting a scary burlap scarecrow mask, we often look for burlap that has a natural, coarse texture. This enhances the rustic, aged feel we aim for in our most chilling designs.
We typically prefer burlap that is neither too thin nor too thick, allowing for flexibility in shaping while still holding its form once stiffened. A durable burlap ensures your mask withstands wear, whether it’s for a night of trick-or-treating or a static display.
Securing Your Armature or Mold: The Foundation for a Strong Burlap Mask
The armature is absolutely crucial for shaping and structuring your burlap mask, providing the essential base that dictates its final form. We’ve found that a solid mold prevents your mask from collapsing and ensures consistent, repeatable results.
In our workshop, we frequently use Face shells, whether they’re latex or 3D printed, as they help keep the itchy burlap off of your skin for comfort. These face shells also play a vital role in helping to hold the shape of the mask, creating a professional and comfortable wear.
Other popular choices for armatures include foam heads or custom-sculpted clay molds, depending on the complexity of your DIY burlap mask. Regardless of your choice, preparing your armature for burlap application involves ensuring a smooth, non-stick surface. We often cover our armatures with cling film or a release agent to prevent the burlap from permanently adhering, making removal much easier.
Gathering Essential Mask Making Materials and Tools
Beyond burlap and an armature, a specific set of tools and materials is essential for crafting a high-quality burlap mask. Our go-to materials and tools include a good sharp pair of material scissors for cutting the burlap, as precision is paramount.
Adhesives are another critical component, and we’ve certainly had our learning curve with them; finding the right kind of glue to stick burlap to face shells was a memorable mistake that shaped our current process. For stiffening burlap and creating permanent bonds, we’ve found that a strong, flexible glue like diluted PVA (wood glue) works exceptionally well.
This directly addresses the common question, “What is the best glue for a burlap mask?” We also use specialized fabric stiffeners for certain projects. For detailing, we rely on a variety of paints, brushes, and utility knives for precision cutting.
Safety equipment, such as gloves and ensuring good ventilation, is also paramount in our workshop. These precautions protect us from fumes and sticky situations, making the mask-making experience both productive and safe.
Mastering Burlap Stiffening Techniques for Durability and Form
A key step in learning how to make a burlap mask that stands the test of time and maintains its frightful shape involves mastering stiffening techniques. Without proper stiffening, your detailed scarecrow mask or horror creation could lose its form and impact. We’ve experimented with various methods in our studio to achieve the perfect rigidity.
Preparing Your Burlap: Cutting and Pre-treating
Before any stiffening takes place, careful preparation of your burlap pieces is essential. We begin by measuring and cutting burlap pieces according to our mask’s design, ensuring we have enough material to cover the armature with some overlap for shaping. Accurate measurement at this stage minimizes waste and streamlines the subsequent steps.
For a natural, rustic, and particularly scary burlap scarecrow mask, we often incorporate initial fraying techniques along the edges of the cut pieces. This involves gently pulling threads to create a worn, organic look before the stiffening process. This small detail significantly enhances the aged appearance of the finished mask, adding to its overall terrifying aesthetic.
Effective Methods to Stiffen Burlap: Holding Its Frightful Shape
One of the most frequently asked questions we encounter is, “How do you stiffen burlap for a mask?” In our workshop, we primarily employ a few reliable methods to ensure our burlap masks hold their desired shape and achieve optimal rigidity. Using a dedicated fabric stiffener offers professional results, creating a firm yet lightweight structure.
Another highly effective approach is the diluted glue method, where we typically use PVA or wood glue mixed with water. This solution provides excellent rigidity and forms a strong bond, addressing the initial challenge we faced in finding the right adhesive.
For lighter stiffening or as an alternative, starch solutions can be used, though we find them less robust for highly structured horror masks. Regardless of the method chosen, proper drying techniques are crucial; ensuring your burlap sets correctly, often with the aid of fans or natural air drying, prevents sagging and maintains the sculpted form.
Applying Stiffener for Optimal Rigidity: A Step-by-Step Guide
Achieving consistent strength and durability in your burlap mask hinges on the correct application of the stiffener. We always aim for an even application across all burlap surfaces, which prevents weak spots and ensures uniform rigidity throughout the mask.
In our workshop, we often use layering techniques for added durability, especially in areas requiring more structural support like the brow or jawline. This involves applying multiple thin coats or layers of burlap, allowing each to partially dry before adding the next, which builds impressive strength without excessive bulk.
We’ve also learned to troubleshoot common stiffening issues, such as uneven drying or areas that remain too pliable. Applying additional stiffener to these specific spots and ensuring proper drying conditions usually resolves these problems, leading to a perfectly firm and frightful creation.
Sculpting Your DIY Burlap Mask’s Form with Precision
With your burlap stiffened and ready, the next critical phase in making a burlap mask is sculpting its unique form. This is where your vision truly starts to take shape, transforming flat fabric into a three-dimensional menace.
Basic Shaping and Forming Over Your Armature
The initial placement of burlap pieces on your mold sets the stage for the entire mask’s structure. We carefully drape and press the stiffened burlap over the armature, ensuring full contact to capture every contour. This meticulous process helps to build out the overall head shape and contours precisely as intended for your DIY Burlap Mask.
To achieve a professional finish, we focus on smooth transitions and wrinkle reduction during this stage. Using gentle pressure and sometimes applying a little extra adhesive, we smooth out any bumps or creases, ensuring the burlap conforms perfectly to the armature. This early attention to detail is vital for a clean, compelling base that will support further distressing and detailing.
Creating Distinct Contours and Foundational Elements
Once the basic form is established, we move to creating more distinct contours and foundational elements that give the mask its character. Techniques for building out cheekbones, brow lines, and jaw structures involve strategically layering smaller pieces of burlap or carefully manipulating the existing fabric.
We often use additional burlap layers to build texture and depth, particularly around areas that would naturally protrude on a face or skull. This adds realism and a more menacing presence to a scarecrow mask or horror icon. Ensuring proper ventilation and eyehole placement is also critical during this shaping process, not just for the mask’s wearability but also for maintaining its structural integrity as it dries.
We meticulously cut out eyeholes and other openings, checking alignment and symmetry to ensure a balanced and terrifying expression. These foundational elements are essential for a believable and frightening aesthetic, guiding the subsequent detailing phases.
Crafting Expressive Facial Elements for Your Scarecrow Mask or Horror Icon
The face is where a burlap mask truly comes alive, embodying either the vacant stare of a scarecrow or the chilling malice of a horror villain. Crafting expressive facial elements is central to making a burlap mask that evokes a strong emotional response.
Designing and Attaching Eerie Eyes
The eyes are often the first point of connection and the most crucial for conveying emotion or dread. When designing an eerie Scarecrow Mask, we carefully choose eyehole shapes and sizes for maximum impact.
Methods for creating hollow, glowing, or stitched eyes vary depending on the desired effect; hollow sockets can be achieved by simply cutting out the burlap, while glowing eyes might involve internal LED lights. For visibility and an added layer of creepiness, securing eye mesh or sheer fabric from within is a technique we frequently employ.
This allows the wearer to see out while obscuring their own eyes, enhancing the mask’s unsettling mystery. The careful placement and detailing of the eyes are paramount to establishing the mask’s overall frightful persona.
Shaping Gaping Mouths and Menacing Grins
A mask’s mouth can convey a range of terrifying emotions, from a silent scream to a predatory grin. We use various techniques for cutting and forming mouths that convey emotion, whether it’s a simple, ragged slit or a more elaborate, snarling maw.
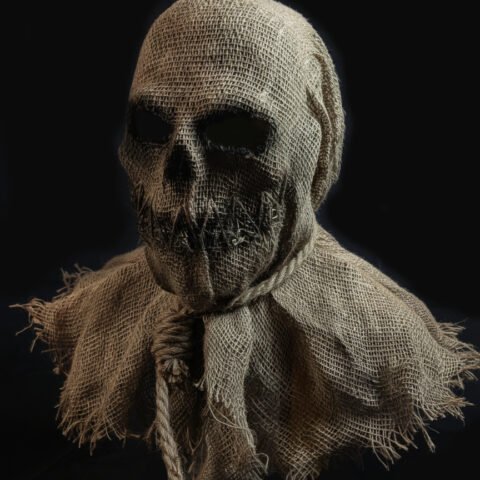
For horror masks, adding teeth, fangs, or rotted gums crafted from clay, EVA foam, or even extra stiffened burlap can significantly amplify the terror. For a classic scarecrow, creating the signature stitched mouth is a hallmark detail, often achieved with strong twine or rope sewn through the burlap.
This stitched detail instantly transforms the mask into a recognizable, menacing figure. Each detail contributes to the narrative of the mask, enhancing its visual impact and fright factor.
Strategic Stitching and Seams: Adding Character and Dimension
Stitching is not just functional; it’s a powerful aesthetic element in a burlap mask, adding character and dimension. We often use hand-stitching techniques for visible, rustic seams that reinforce the handmade, weathered appearance of the mask.
Using twine, rope, or thicker threads not only secures pieces but also serves as authentic detail, reminiscent of patched-up farm garments or gruesome repairs. The impact of stitch placement on the mask’s overall expression is profound; strategically placed stitches can define features, imply wounds, or create a unsettling patchwork effect.
We might use large, uneven stitches for a crude, Frankenstein-esque vibe, or finer, more uniform stitches for a deliberately uncanny look. Every stitch tells a story, contributing to the mask’s unique, terrifying persona.
Infusing Terror: Distressing, Detailing, and Painting Your Burlap Mask
Once the form and facial features are in place, the real magic of making a burlap mask unfolds through distressing, detailing, and painting. These steps are crucial for transforming a simple burlap shape into a truly terrifying and professional-looking horror prop or costume piece.
Achieving a Truly Scary or Highly Detailed Appearance
Achieving a truly scary appearance for your burlap mask often comes down to the art of distressing. We employ various fraying techniques for age and decay, intentionally pulling threads or roughing up the fabric to simulate years of exposure and neglect.
Adding cuts, tears, and battle damage helps to tell a story, implying a violent past or constant wear that makes the mask feel more authentic and lived-in. For more gruesome effects, we sculpt scars and wounds with extra burlap layers or adhesive, building up textures that mimic torn flesh or festering sores.
These details elevate a basic burlap mask into a compelling narrative piece, significantly enhancing its fright factor. Each element is carefully considered to contribute to the overall horrifying aesthetic we strive for.
Painting Techniques for Burlap: Bringing Your Vision to Life
Painting is where the personality of your burlap mask truly emerges, bringing texture and depth to your vision. We’ve experimented with various paints, finding that acrylics, fabric paints, and even certain spray paints work best for burlap, offering good coverage and durability.
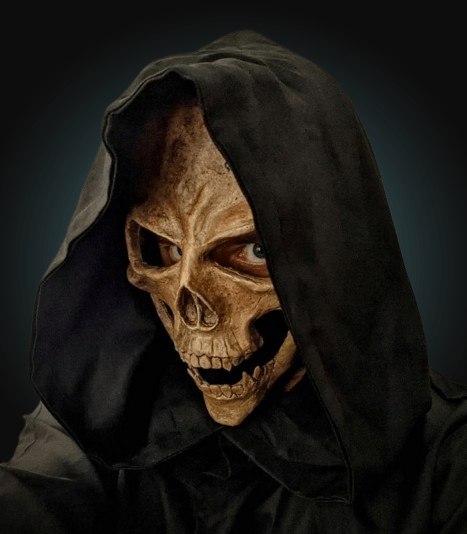
A particularly challenging project involved a customer asking for a black burlap mask over a skull face shell. It sounded great on paper, but because it was black, we couldn’t see the details of the skull too well. Fortunately, we managed to pull out the highlights using a dry brush technique in a lighter shade of paint over the top and then used an airbrush with black paint to paint in the deeper areas of the skull.
This experience taught us the power of these specific techniques, directly answering the question, “Can you paint on burlap for a mask?” Dry brushing is excellent for highlighting raised textures and creating a weathered look, while airbrushing allows for smooth gradients and detailed shading that adds incredible realism. We also use washing and distressing with paint for an aged or grimy effect, letting diluted paints settle into the burlap’s weave.
Layering colors is essential to enhance shadows and highlights, giving the Burlap Mask a three-dimensional quality and making it feel truly menacing. Each layer builds depth, transforming a flat color into something rich with character and decay.
Adapting Your Design: From Classic Scarecrow to Horror Icon
The beauty of making a burlap mask lies in its versatility, allowing for adaptation from a classic Scarecrow to a chilling horror icon. For an authentic scarecrow mask, we typically stick to earthy color palettes: shades of brown, beige, faded greens, and dull reds to mimic old straw and patched fabric.
Detailing might include artificial straw poking through seams or faded patches painted on. To transform the design into a chilling horror creature, like a Jason-inspired piece, we shift the focus to darker, more ominous colors, perhaps incorporating blood spatters, deep shadows, and stark contrasts.
Small adjustments, such as subtly altering eyehole shapes or the curve of a stitched smile, can have a big impact, defining the mask’s overall theme. These nuanced changes ensure your burlap mask effectively conveys its intended character, whether it’s a rustic threat or an urban terror.
Securing and Refining Your Frightful Creation for Wear or Display
The final stages of making a burlap mask involve securing its longevity and ensuring it’s comfortable for wear or striking for display. These refinements add professional polish and durability to your terrifying creation.
Applying Sealants and Protective Coatings for Longevity
To ensure your burlap mask withstands the elements and time, applying sealants and protective coatings is a crucial step. The benefits of sealing your burlap mask are numerous, including increased durability and enhanced weather resistance, especially for outdoor use or prolonged display.
Choosing the right sealant depends on your desired finish; matte sealants maintain the burlap’s natural, rustic look, while satin or gloss finishes can add an unsettling sheen or protect painted details. We emphasize proper application, typically multiple thin coats, to ensure a lasting finish without altering the mask’s carefully crafted texture.
Adding Straps, Padding, and Linings for Comfortable Wear
For masks intended to be worn, comfort and a secure fit are paramount. We dedicate time to designing and attaching securing straps or elastic bands that are robust yet discreet, ensuring the mask stays firmly in place during movement.
Internal padding is added for comfort and to achieve a snug fit, preventing the mask from shifting and irritating the wearer. We also offer various lining options, such as soft felt or fabric, which are essential for keeping the itchy burlap off the skin, making the mask wearable for extended periods.
These comfort-focused additions are often overlooked but are vital for a truly successful and user-friendly burlap mask.
Final Touches and Display Considerations
Before declaring your burlap mask complete, a final inspection allows for any last-minute adjustments, from reinforcing a seam to touching up a paint detail. We meticulously review each mask, ensuring every element aligns with our vision for a terrifying creation.
For storage, we recommend tips for storing your burlap mask to maintain its shape, such as placing it on a mannequin head or stuffing it with crumpled paper to prevent distortion. Finally, creative ways to display your terrifying creation can turn it into a striking piece of decor.
Whether it’s mounted on a wall, perched on a stand, or integrated into a larger scene, showcasing your handmade burlap mask allows its frightful artistry to be fully appreciated.
Bringing Your Terrifying Burlap Vision to Life: A Journey Concluded
Embarking on the journey of learning how to make a burlap mask is a deeply rewarding experience, transforming simple fabric into a potent symbol of fear and folklore. From selecting the perfect weave to applying the final sealant, each step demands thoughtful consideration and a touch of artistic flair. We’ve explored the intricate process in our workshop, discovering that crafting a truly memorable DIY burlap mask is a testament to patience, ingenuity, and a passion for the macabre. Now, let’s reflect on the core insights that will empower you to create your own professional-grade, fright-inducing masterpiece.
The Foundation of Fear: Mastering Materials and Structure
At the heart of every durable and visually striking burlap mask lies a solid understanding of materials and foundational structure. We’ve learned through experience that the quality of your chosen burlap is paramount; a good quality, naturally coarse weave provides the ideal canvas for a distressed, aged aesthetic, ensuring flexibility while maintaining form once stiffened. Selecting burlap that is neither too thin nor too thick allows for optimal sculpting and durability, crucial for creations designed to withstand the rigors of wear or display.
Equally critical is the armature, which we see as the skeletal framework for your mask. In our studio, we swear by Face shells, whether they’re crafted from latex or 3D printed. These serve a dual purpose: they provide an essential, unyielding base for shaping the burlap and, crucially, they keep the often-itchy burlap off the wearer’s skin, vastly improving comfort. This insight was hard-won, as we discovered early on that a comfortable mask is a wearable mask. Preparing your armature with a release agent ensures a clean removal, preserving both the mold and your meticulously sculpted burlap.
Beyond the core components, the right tools and adhesives are non-negotiable. We always have a good sharp pair of material scissors on hand for precision cutting, ensuring clean lines and minimal fraying where it’s not desired. And when it comes to adhesives, we certainly had our learning curve; finding the right kind of glue to stick burlap to face shells was a memorable mistake that shaped our current process. We’ve found that diluted PVA (wood glue) is exceptionally effective for stiffening burlap and creating robust bonds, directly answering the common query about the best glue for this craft. These essential Mask Making Materials are the unsung heroes of a long-lasting and impactful design.
Breathing Life into the Burlap: Shaping and Detailing
Once your burlap is prepared and stiffened, the true artistry begins: transforming the two-dimensional fabric into a three-dimensional character. Our approach emphasizes careful layering and meticulous shaping over the armature, building out distinct contours for cheekbones, brow lines, and jaw structures. This foundational sculpting sets the stage for the mask’s unique personality, ensuring smooth transitions and a compelling silhouette. We pay close attention to critical elements like proper ventilation and precise eyehole placement, not just for the wearer’s comfort and vision but also to maintain the mask’s structural integrity.
The expressive facial elements are where a burlap mask truly comes alive, whether it’s the vacant stare of a Scarecrow Mask or the menacing grin of a horror villain. From shaping eerie eyes, using mesh for visibility while obscuring the wearer’s own, to crafting gaping mouths with added teeth or signature stitched patterns, every detail contributes to the mask’s narrative. Strategic stitching, particularly with coarse twine or rope, isn’t merely functional; it’s a powerful aesthetic tool. These visible, rustic seams reinforce the handmade, weathered appearance, hinting at a history that makes the mask feel authentic and terrifying.
Infusing terror culminates in the distressing and painting stages, where your vision gains true depth and character. We employ various fraying techniques and strategically add cuts, tears, and even sculpted wounds to imply age, neglect, or violent encounters. Painting is perhaps the most transformative step, allowing us to enhance textures and convey mood. We’ve had challenging projects, like a customer requesting a black burlap mask over a skull face shell. It sounded great on paper, but because it was black, we couldn’t see the details of the skull too well. Fortunately, we managed to pull out the highlights using a dry brush technique in a lighter shade of paint over the top and then used an airbrush with black paint to paint in the deeper areas of the skull. This experience taught us the immense power of dry brushing for highlighting texture and airbrushing for seamless shading, proving that specific techniques can overcome even the trickiest color choices and bring out intricate details on burlap.
The Enduring Creation: Comfort, Longevity, and Legacy
A truly successful burlap mask is not just visually striking; it’s also durable and, if intended for wear, comfortable. Applying sealants and protective coatings is a non-negotiable final step in our process, safeguarding your creation against wear, weather, and time. We carefully choose between matte finishes to preserve burlap’s natural look and satin or gloss for a subtle, unsettling sheen or enhanced paint protection. For masks meant for performance, the internal refinements are paramount. We meticulously add secure straps, internal padding for a snug fit, and various lining options, like soft felt or fabric, to ensure the itchy burlap never directly contacts the skin. These considerations make a world of difference, transforming a mere prop into a comfortable and engaging part of a costume.
As you complete your burlap creation, remember the transformative power of your craft. Each choice, from the burlap’s weave to the final stitch, contributes to a unique narrative of fear and artistry. Whether your ambition is a classic Scarecrow for a harvest haunt or a grotesque horror icon for a convention, the techniques shared here provide a robust framework. Your handmade burlap mask is more than just an accessory; it’s a statement, a piece of wearable art, and a testament to your dedication. We encourage you to continue experimenting, pushing the boundaries of what burlap can become. For more inspiration, high-quality materials, and additional tutorials, explore Devil’s Dreamworld and our shop. What chilling new character will you conjure from the humble weave next?
Further Reading
For more background and inspiration, explore related resources on Wikipedia.

Comments 0
Log in to leave a comment.